

The last updates covered the modifications to the trans tunnel and the front subframe. As I initially thought through the “body drop” I tried considering the implications of having the drivetrain raised almost an inch and a half. In prior posts I pridefully noted that I got better at thinking everything through, and while that may be the case, I certainly did not consider everything. This update will cover some additional metal work needed to keep everything tucked up nicely, some unnecessary tucked wiring, the aesthetic refresh before Final Bout SSE, and coverage of the event itself.
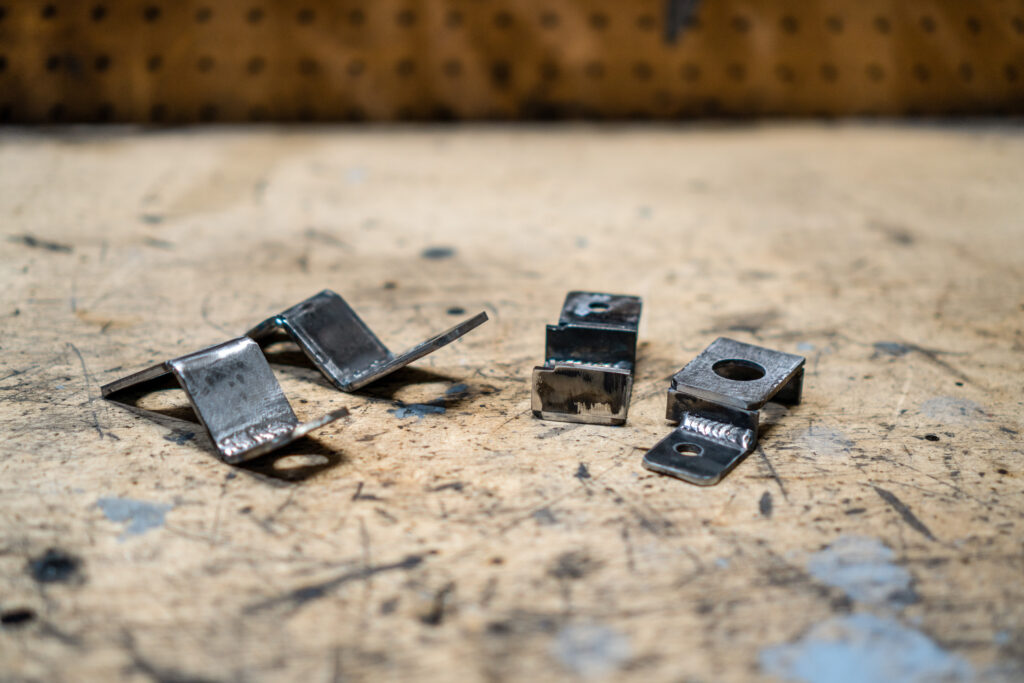
Before we start with the low stuff, I have a bit of a funny anecdote to share on the tension rod brackets. I have always noticed that the front suspension of the car felt kind of loose, and wasn’t sure why. One day I believe I was trying to nut and bolt check the car and realized the two bolts that threaded into the frame rails would not tighten at all. This wasn’t a righty loosey type situation, it was just loosey all around. The nuts that are spot welded to the lower section of the frame rail were wiggling when you looked at them too hard. I’d have to guess the garbage spot welds that hold the nuts to the frame broke off when the either/both the sway bar/power brace hit the ground while driving. When I noticed this well over a year ago, I realized that the only way to repair this was to cut a window in the rail to re-weld the nuts. I had no interest of doing that at the time, and the side of the frame rail that was accessible with the engine in the car (the wheel well side) has another piece of steel on the inside, likely for strength. So the best way to repair this was from the engine side. My temporary solution back then was actually to weld the damn power brace to the chassis! I did three spot welds per side, and actually held the thing onto the car, until this day.
The repair was simple, cut a window, prep the steel, blast it with the MIG, close the window, then soak the rails in cavity wax.

I also learned that the frame rails are not a thick piece of steel, but also ~22GA steel doubled up. These entire cars are essentially ~22GA steel, spot welded + glued together and doubled up where the engineers found it necessary (which wasn’t as used throughout the car as it likely should have been). I beveled the fuck out of the steel to get the best penetration possible. I had no interest in wasting time grinding the welds flush.

I brushed some black epoxy over all the bare metal areas, then dropped the engine back in.
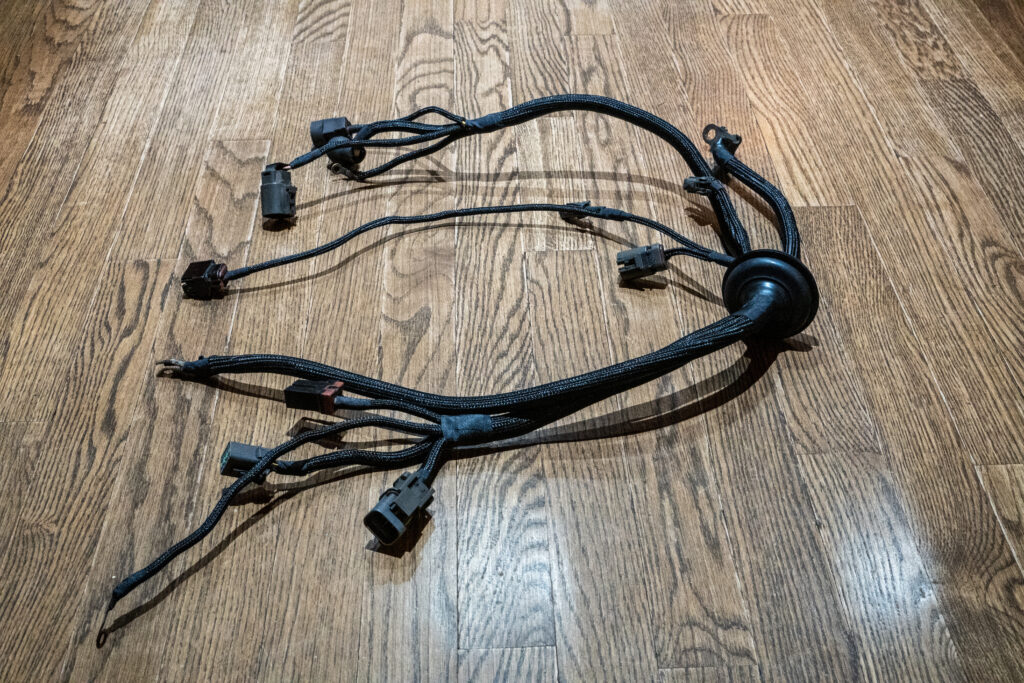
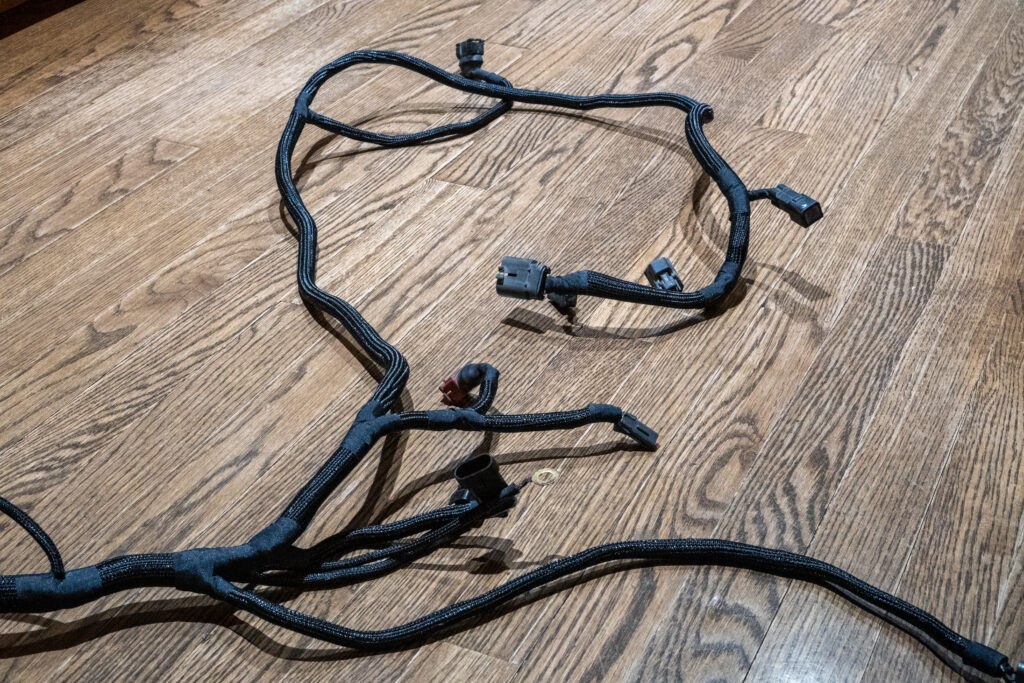
When I went to re-install the lower harness, I was disappointed with how messy the battery relocation connection looked in the engine bay. Really, I was blown about the overall routing of the wires in that lower, intake side of the engine bay.
The stock harness is meant to sit entirely in the engine compartment, which is what makes that lower section of the engine bay appear in disarray. That thing is generally engulfed in oil too, likely after the oil filter removal spews oil all over the harness unless you use a bag to remove the filter.
I’ve always hated looking at that thing, and wanted to finally try and execute an idea I have had for awhile. The main motivation behind this was to obviously improve the wiring aesthetic in the bay, but also move the battery power wire out of the engine bay, and not have the power wire pass through the firewall.
To solve this: I drilled a hole in the lower firewall, shortened some transmission wires, extended a few EFI harness wires, sourced a behemoth of a grommet, and added an insulated, bolted connection for the power wire. Due to not depinning and replacing the plugs, and using a wrap-style insulation, I’d say this is a pretty mid-grade wiring project, but way safer than my prior setup and looks a bit better, too.
When I went to bolt the header, well, I couldn’t. The damn thing wasn’t even close to lining up with the rest of the exhaust, it hit the floor near the flange and top section. Can’t way I’m surprised. Before the pragmatic side of me thought of an actual intelligent solution, I quickly grabbed the trusty grinder and cut a large hole in the car like the barbarian I sometimes am. I used to be tremendously anti-cutting shit and only used a grinder on a vehicle when necessary. Now I love cutting stuff, neatly.
I actually thought about this mod quite frequently at Nick’s house while I was doing the front subframe mod. My initial idea was to get a 3.5″ – 4.5″ diameter steel tube, cut the tube in half, and use that as the channel. I realized the cut would need to be immensely precise, and mating the tube with the firewall would be a bit tricky. Instead I made the largest cut that would line up with the cat hump. That 2″ tab in the top right of the hole is where the transmission mount bracket overlaps with the body.

Once the hole was trimmed, I started making the raised section of the floor. I made a few cardboard mockups to test in the other S13 so we could replicate how the pedal feel would change.

I’m really happy with the way this came out, the pedal feel was perfect.

We put a lot of effort in the heat management when welding and it really paid off.

Here’s a view from the exhaust side:

Tried a dry-fit of the header, and this thing was still grazing the top of the newly raised exhaust tunnel. I think we’d be able to run that header as-is, but the whole point of doing this mod was to create some space between the header and the exhaust. Creating any higher of an exhaust tunnel would make the pedal feel a bit awkward, so I cut and extended the header about 25mm (1″).


Brushed some black epoxy and added some DEI padding:

Here’s the final product, the exhaust has decent space between the DEI insulation, AND still sits above the frame rails! I can happily report that I no longer burn the soles of my shoes on road trips and during drift events.

While putting the front suspension back together, I came to realize why so many of the guys in Japan that do these low mods delete their sway bar. There’s absolutely no room to get the bar in the tension rod bracket if you raise the pickup point. Even if you did, the sway bar end links will not line up with the hole on the control arm.
To solve this, I re-drilled the end link hole about 30mm further inwards, then welded an 1/8″ plate for strength.

I did not want to give up the sway bar, I purposefully run softer spring rates than a lot of low static drift cars because this is what at least helps retain some degree of functionality in the suspension. This does, however create a lot of problems, which actually fortify the need for this degree of chassis modification. “Softer” is also relative, these are 12k front springs, which is not much stiffer than the usual 7-9K springs we see on the front of drift-oriented S13s.
The front sway bar helps prevent having to depend on stiff spring rates to avoid excessive suspension travel, which is what helps retain good front wheel/tire fitment. Too high of a front spring rate and you can run much more aggressive fitment, but lose a lot of response in the front. Too low and you run a higher risk of tugging at the inner fender lip, leading to a buckled arch, however the front will respond nicely and “bite” better while drifting and general spirited driving. An unresponsive front end makes manipulating the weight of the car quite difficult, which can actually create serious understeer problems in low cars.
Again, I’m an absolute pinecone when it comes to proper car setup, so the above is largely what I have personally tested with my own setups, and also other cars I’ve been given the opportunity to experience.
Grabbed some fresh bushings and brackets to replace the bent ones I had to cut in half to remove. The sway bar went on nicely, but was now the lowest point in the car. We still had solid ground clearance, but I will soon develop a method to raise this higher.

One weekend, Albert came over to Nick’s to have his Fineline Tuning kit mounted. He was having a hard time mounting the kit, noting that the kit appeared to be “too wide” for the car. We decided to cut the bumpers in half, and ended up removing about 3cm (1.2″) of material to have everything line up. He also mounted up his Type 2 hood and left Nick’s house with his ride looking super hot. This was Nick’s first large fiberglass job and he did some solid work here.


Also spent some time at the Josh Le residence celebrating the upcoming birth of his offspring

The deadline to have this car moving again was mid March 2023 for a private day at Shenandoah that Sabotage was hosting. Once I lowered the car down for the first time, I just moved it around the driveway briefly to let everything settle, then propped the car up on my alignment blocks and did a quick alignment. When I pulled onto the main street and gave the car the beans, I was elated to feel the car not scrape on sections of the road that it usually scraped, and it drove straight! I was a bit concerned something would end up crooked, or bent, or who knows. The mind surely wanders when the time comes to give the car a test drive after major changes, and we effectively cut the car in half and welded it back together.
Now that we run and drive, we had a few days before the event to repair Andy’s handiwork, which he was kind to sign. Looking back at this, Andy has some neat handwriting.

With the quarter off, we’re dealing with another B-pillar/quarter hit.


Same repair process as usual, inflate a ball in the hole, stud welder, hammer & dolly, then fiberglass repair. I’ll spare the details since this is the third time we do this.


Shot a coat of epoxy primer to seal everything up, and slapped the car back together!

Big thanks to Collin for the early christmas present! I absolutely love this dash mat and this thing has made me really enjoy taking photos of the interior now:


I then went down to a 205/40R17 up front. The clearance + stretch a 205 gives on a 9J is killer. My boy Nick P used to run this size and I always thought it was wild, but looking at the stretch now, it’s very similar to a 215/40 on a 9.5. A square inner bead is close to where I’d draw the line. My concerns with the 205 up front were streetability and grip.
On the street, the 205 has been fine, I’ve done close to 1k miles through VA + WVA on this setup (as of June 2023) and haven’t had issues (knock on wood.) After putting a good bit of thought into it, the front grip concern is hardly an issue because we have no front grip to begin with. I just need to keep manipulating the weight of the car during drift to prevent understeer. I also went from a 215/40R17 460TW to a 205/40R17 300TW. I figured the softer compound and running slightly lower tire pressures would offset the slight drop in size, which was marginal anyway.
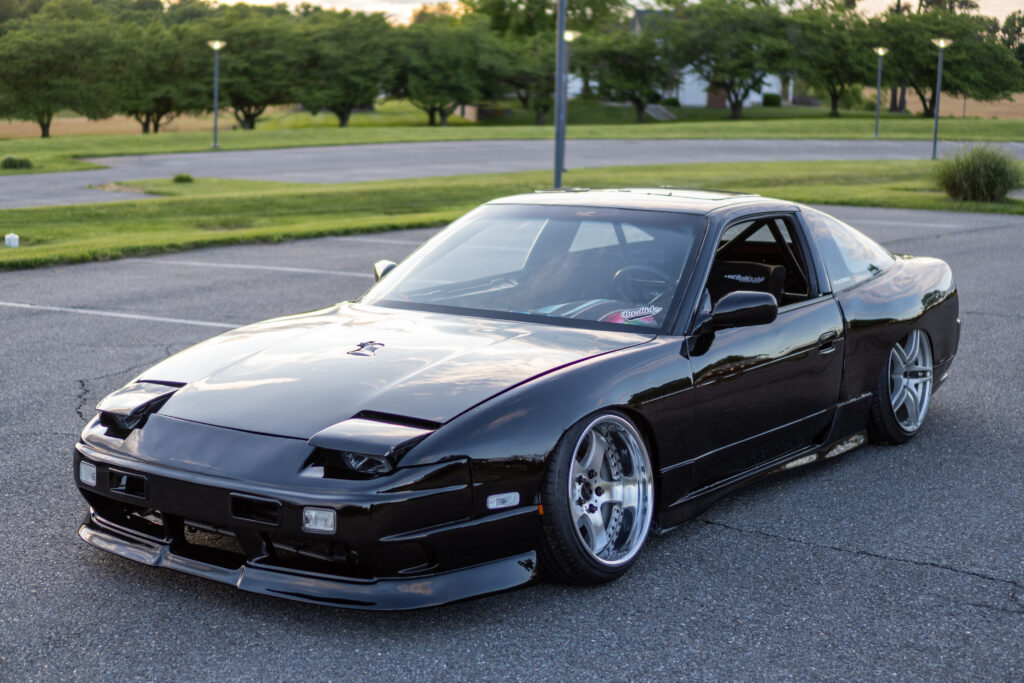
They look sweet and the ricer in me adores the stretch:


Full disclosure – it definitely feels hilarious being my age, having years of drifting experience, and still getting excited over stretched tires like a teenager. Maybe one day I’ll grow up and run larger tires, but I’ll always love a nice stretch.

Big thanks to Felix for mounting these! We beaded these up on the machine without a cheetah. I can confidently say I’m a fan of these Cosmo tires, I’ve ordered two additional pairs for the front since. I then slapped some panels and it was time to go drifting!
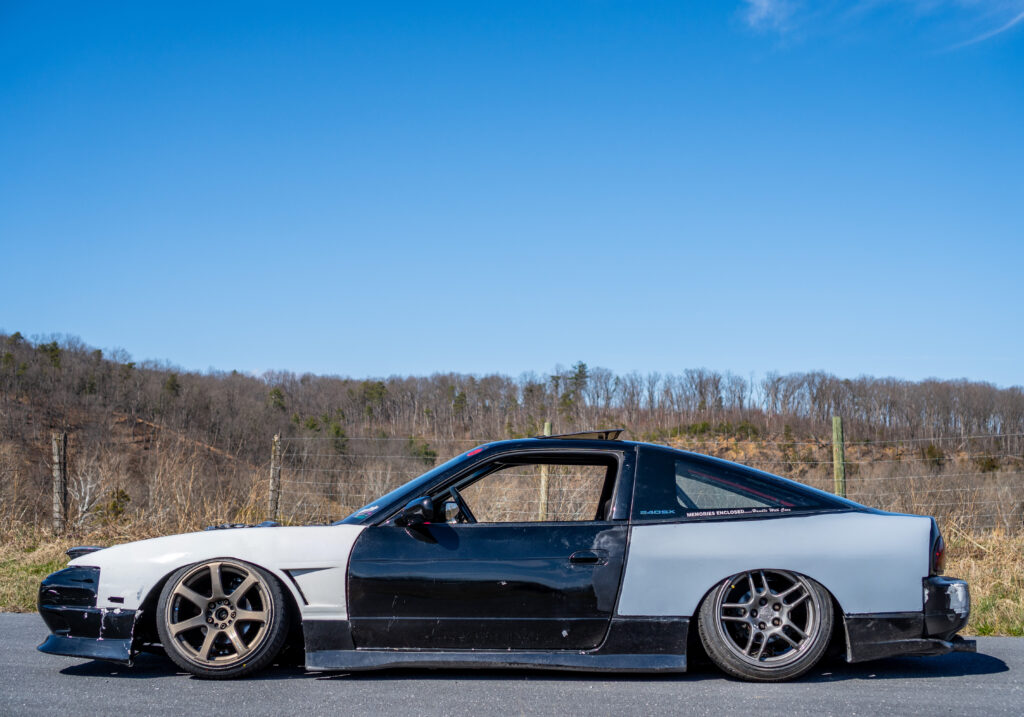
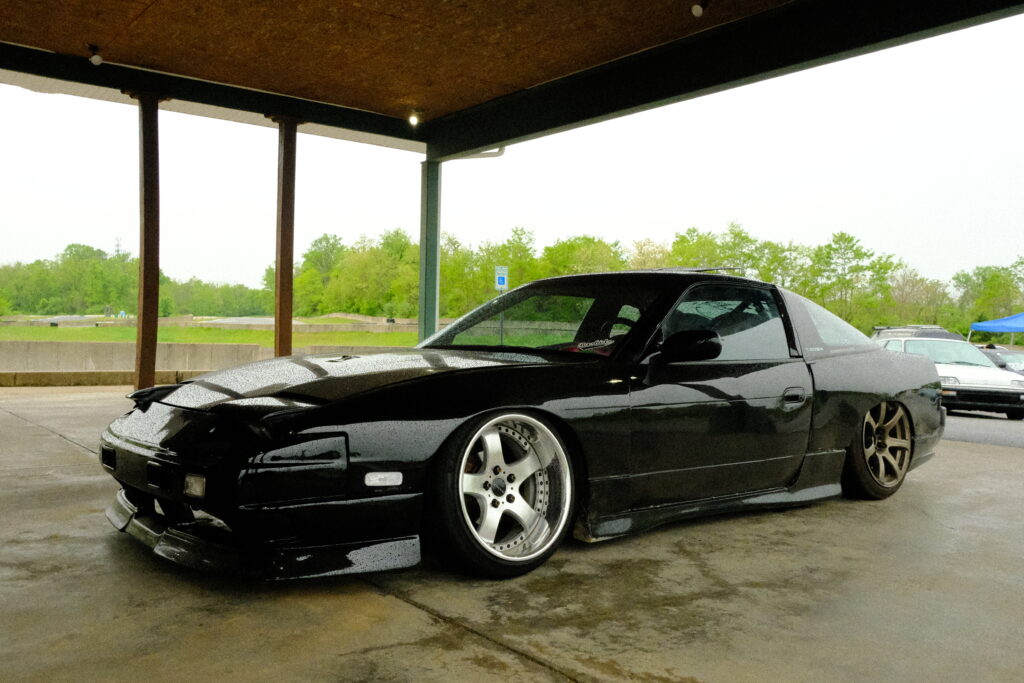
The whole point of the body drop was to obviously give myself some additional ground clearance, but the car didn’t feel “low enough.” This is an odd topic that I constantly ruminate on, you just end up getting used to the height, your brain assimilates, and after a bit you look hard at the car and it almost seems “not low.” These intrusive thoughts are what really create the drive and motivation to continue finding ways to bring the car down. Anyway, I dropped the rear down 1/2″ and the front 1/4″. Going down to the 205/40 up front essentially made the drop 1/2″ all around, and I completely fell in love with the car once again despite how haggard it looks here. Seeing the front almost tucking brought JOY!

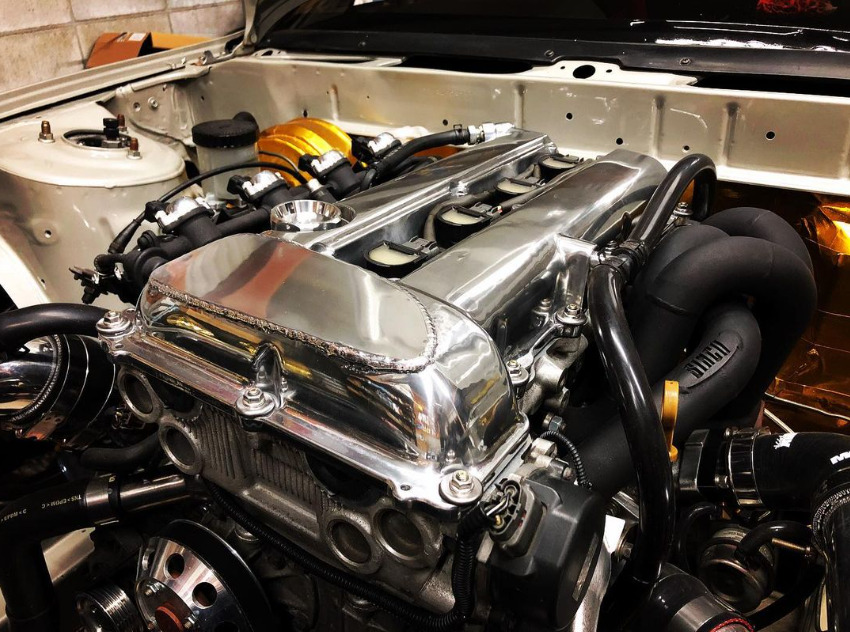
While writing this, I noticed something I had somehow overlooked when I was prepping for this event. Look at the angle of the upper radiator hose in the below photo. The sharp angle really accentuates the engine raise, and is actually an issue we solved a few weeks later.

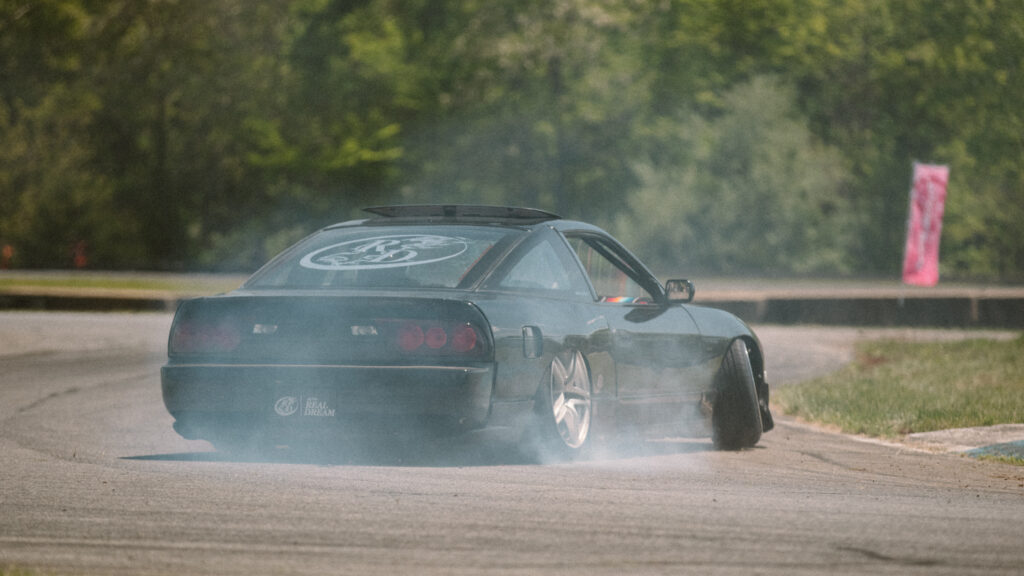
The first lap out, I had the typical “first event of the season” sensation where you’re just doubting everything and wondering when disaster is going to strike. I took my usual 50% then 90% grip parade laps to feel everything out. While I was surely scraping a lot less on roads I had traveled before, the rear of car was smashing the ground pretty hard under load coming down the infield. After feeling everything out, I hit a quick entry and the car felt just as before.
Man, what a fantastic feeling. I really can’t come on here and speak to the performance element of the car because it’s still a heavily under-powered over-lowered car, but we were at least doing the same type of driving we were doing before at a much lower ride height. This was 100% a victory. Looking back on this, I have pretty abysmal standards for how a drift car should feel, ha!
Thanks Zenki Minh for the photos!


Once I got the feel of things I really tried to start throwing this thing in. The only issue was the tire cutting into the fiberglass fender up front, which is to be expected:

Big thanks to Tyler from Sabotage for organizing everything. His new setup sounded insane with the Tomei cams and a fresh tune. He unfortunately had a few issues with the car and was not able to get out as much as he would have liked, but we all enjoyed hearing this thing screaming in the morning.

Some cool shots from Eric (Slxxpn). I still have to unbolt the damn coilover to change wheels like a pinecone.


Setting up the 1320 cam before Nick and I run for pinks

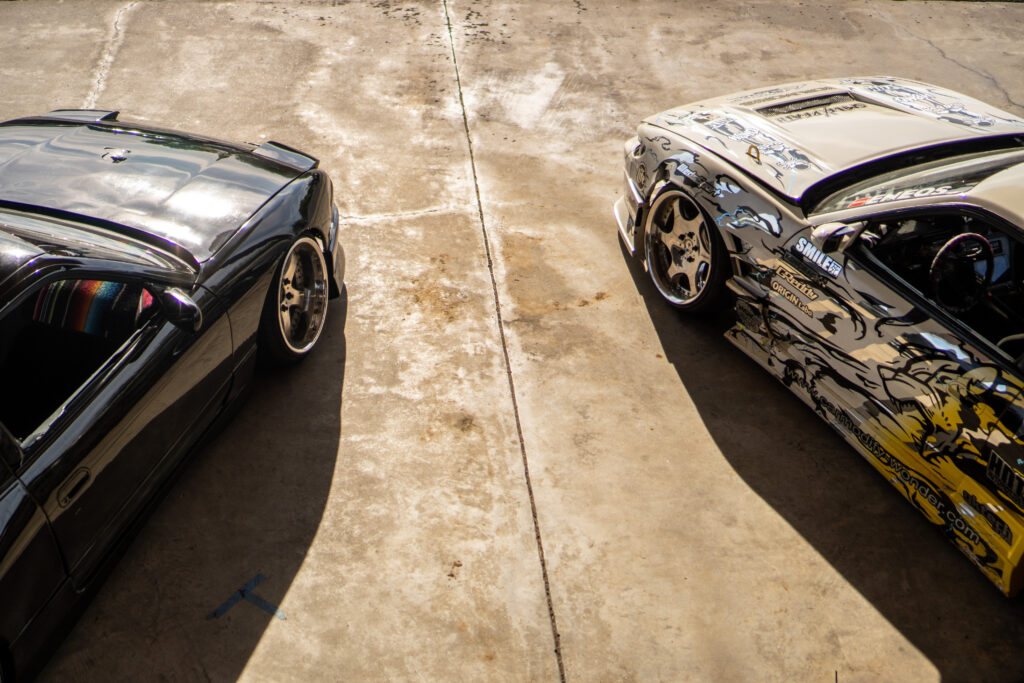
Lined up for an impromptu race! Nick’s car was completely off-time. With his new setup he’d bury my shitty ass car, but I can’t pass up an opportunity to antagonize my boy for a bit.

This was also Aaron’s last drift event in the east coast, we’ll miss his chaotic ass dearly. He also left with a bang and won the entry competition!

While the event went well, there was a LOT to do. Final Bout SSE was looming close, and I needed yet another complete exterior refresh. If you thought last year’s stress levels were high, this year was just slightly worse.
Started with a quick teardown and re-did the wiring for the strobes and underglow. I run LED tubes as opposed to strips because they’re way more durable. They’re about 3x the cost of the strips, but I’m a big fan of buying once and crying once. Sometimes, I don’t even cry once because installing some high quality parts feels fantastic.

After the teardown, I started on the driver side that got hit at DOD last year. I have this bizarre relationship with metal fenders where I always find myself going back. They sustain the most abuse, but in the event of impact, the work to repair them is always going to be exponentially higher. They are also getting slightly difficult to find in good shape, I always end up needing to do a good bit of repairs to get them ready for paint.
Completed some dent repairs and used a hammer + dolly for my usual flat roll:


My primer of choice – Southern Polyurethanes. These products are quite forgiving and I exclusively use their epoxies. You have to order through the phone and they’re tremendously jovial people, and ship really quickly. Something about ordering parts/supplies through the phone just feels right.
I thinned this as much as their TDS allows and shot it out of a Husky gun w/ 2.2 tip.

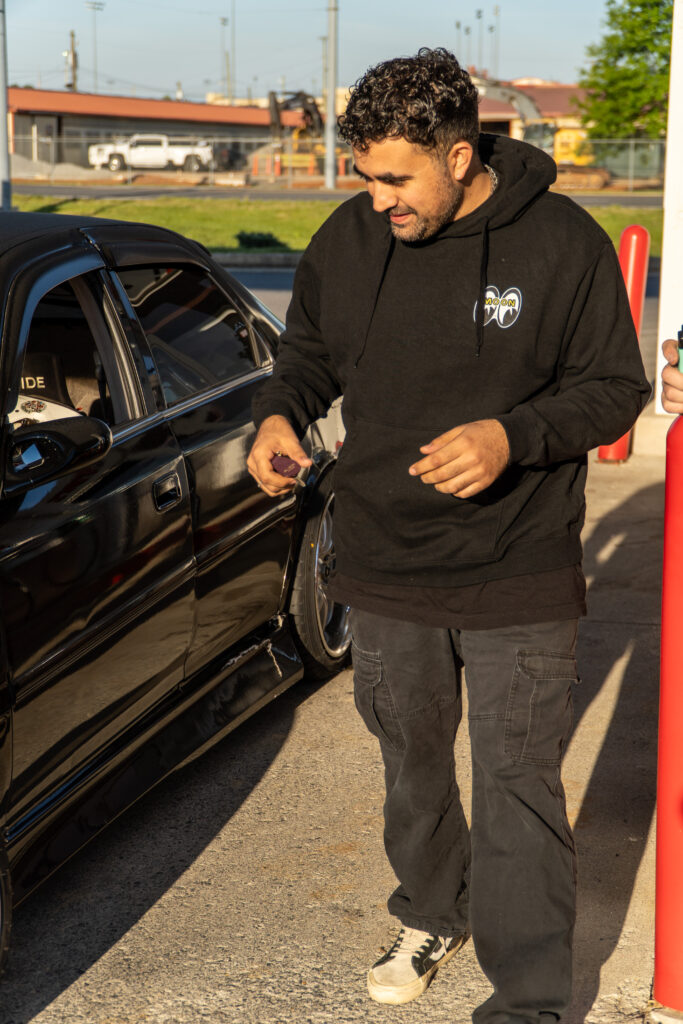
Went for a beer run lookin like a jeep

Another great element of the SPI primer is how nicely this stuff sands. It doesn’t clog up the paper and smooths out real nicely. Here’s the quarter blocked:

Up through here, everything was going smoothly. Prepping a car for paint is one of my strengths, but everything that happens after will literally go either decent or horribly, and that was the theme of SSE prep.
With the quarters basically ready for paint, I started working on the hood cut. I’ve gotten a bunch of questions on this, so I’ll try to lay this out as best I can. Most, if not all schassis with the raised subframe need to address the valve cover, one way or another. The overall hood skins on S13 are hardly forgiving and the downward shape of the hood coupled with how far forward the engine sits greatly reduces clearance. I have only personally seen the raised subframe done on SR20 cars, I know Car Make Revive runs some tremendously low cars, but I believe their S13s run V8 which I imagine benefit from their shorter height. I have not done enough research on their rides to know for sure.
The two main solutions are either modifying the valve cover, or modifying the hood. A third solution could potentially even be to actually lower the engine, but then if you want to raise the transmission, you could end up with some funky pinion angles – but that’s just my speculation. While raising the subframe increases ground clearance for the pan, lowering the engine will null some of those benefits, but I guess could also work. I wasn’t really interested in further developing this idea.
Modifying the valve cover involves cutting a section off the tallest part, and decreasing the height, and welding it back on. For those seeking to cut a potentially expensive hood, or who don’t want a hole in their hood, this is one option.
Another option is to simply cut/trim the hood for clearance. This opens up the bay to the elements, but can look really nice when done right. From the below photos, you’ll notice the SR requires a very simple, round oblong shape.


The issue with the KA valve cover is that the damn thing sits at an angle from factory (perhaps for clearance), and the highest point is the port for the vent. This made modifying the valve cover way past my skillset, not to mention I don’t have a TIG to weld the aluminum. I started the process by swapping out valve covers for another spare one to avoid scratching the finish on the gray one. I then dabbed some grease on the top corner, and checked where the valve cover made contact with the hood. The cut started with a holesaw hole, and I essentially continued checking clearance with grease until I ended up with something like below. The first cut was only ~1-2″ inches wide and six hours later I ended up with this huge hole! The radium fitting obviously takes up a large amount of space, but the final hole is about the size of a palm.
I used a file for most of the contouring to avoid overcutting the hood, but did a good chunk of the work with a die grinder and roloc flap disk. Felt pretty good to close the hood with the correct valve cover on for the last time! Fun fact – the top of the spark plug boot actually still hits the hood just slightly, and creates a pretty ugly gap on the driver side. I wasn’t willing to cut even more of the hood for the boot to clear so I just left it alone. This was enough for me and I’ll just deal with the gap.


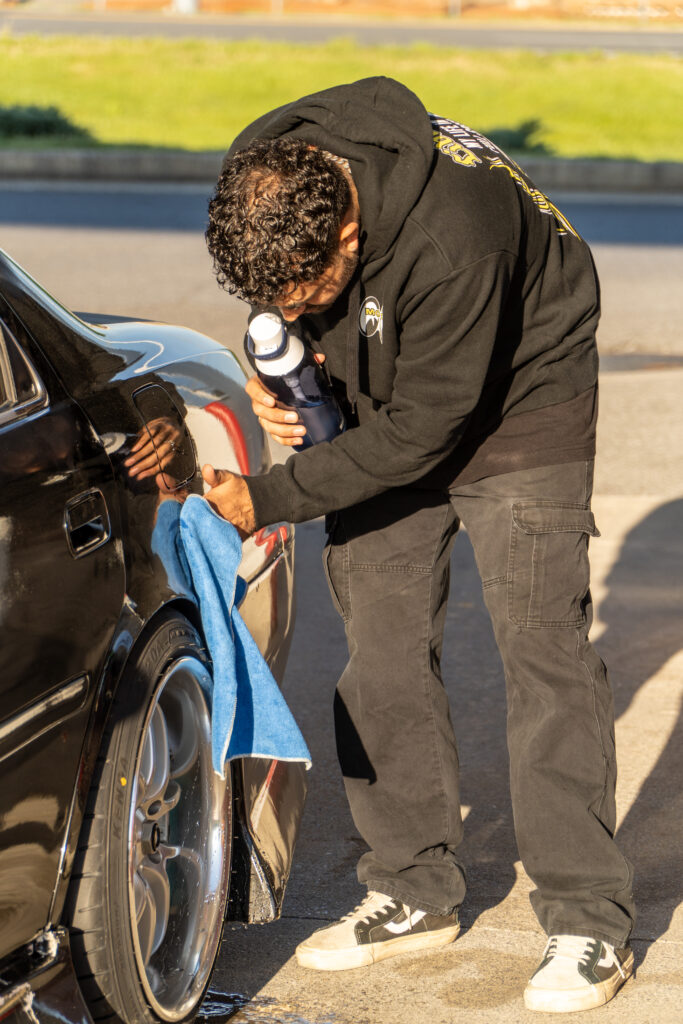
I have a really hard time asking for help, even when I probably need it. I’ve always worked solo, and whenever I needed a second person my girl always assisted. Diego randomly hit me up and offered to come up to help when I mentioned I was struggling. He prepped the rear bumper, buffed the hood, and even did some PDR on the roof! Greatly appreciate his help on this because I was surely getting quite overwhelmed, as usual.


The hood unfortunately needed to be painted again, I kept running into solvent pop issues and contamination in the paint. There is likely an air supply issue into the gun because this issue keeps getting worse! I also had to paint the quarter panel twice for the same reason.

I decided to take a break from the paint gun and delved back into a process that I’m more confident in – fiberglass repair. This bumper has taken pretty gnarly hits from each side between the Pocono Raceway event and 100DOD.


I repaired all the severed sections with the usual fiberglass cloth & resin technique, and leveraged a nice tip from David Bob using a wire brush to score up the inside of the panel for maximum adhesion:

Here’s everything fiberglassed back together in one piece and ready for some putty:


Shot the primer surfacer, then Diane jumped into get everything ready for color!

I picked up some shitty vents off Ebay and fiberglassed them in as well. The completely flat front bumper section was so mundane and needed some spice. These things should also help with airflow, not that my 100hp crusty engine needs any more air.


Back to the issue with the radiator – with the engine raised, the upper radiator hose came in contact with the shortie intake. I somehow didn’t have any issues at the Sabotage event, but the intake had a large black mark from the rubber getting hot, expanding, and rubbing over the pipe. No combination of readily-available hoses would give me the clearance I needed.
I made some tabs to raise the radiator on the power brace, and some new upper brackets to account for the elevated position. I believe this ended up being a 25-30mm raise (~1″). I also cut a small hole in the hood skin for the koyo water neck.


Well, here’s the final product. I ended up painting the hood three times, the quarter twice, the passenger fender twice, and the rear bumper three times. I really think I need to look at my air supply and perhaps install some copper piping to help drain the lines better, or try painting using a buddy’s setup. I’ve experimented with coat thickness, using the right temp reducer, etc. Re-doing each panel was so mentally draining. Painting single stage definitely didn’t help, but I’ve seen plenty of decent single stage results to know that the issue is the pendejo holding the paint gun.


Despite all this nonsense with the paint, I was happy to be finally done. I gave the SSR faces a quick polish and bolted them together, and went to Jack Coleman’ shop, JAC Performance, to have the tires mounted. He always pulls through for me and takes great care of my wheels.
I made a last minute decision to street drive the car to the track, mainly because it seemed fun and I had no motivation left to load up a trailer and all that. Nikos and Seb rolled in close to when it got dark, and in a classic Auto Real Dream fashion, we finished putting everything together at the track the day before the event!

Shoutout to Zenki Minh, Jaz, and Diane for getting the banner on.

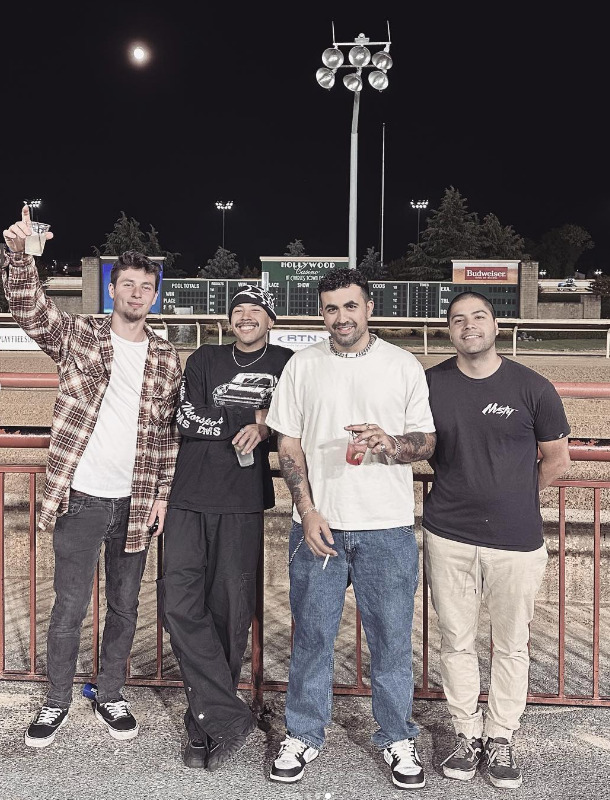
Friday night we all went to dinner! Had such a blast cruising out of the track on those pitch black country roads listening to David Bob and Nikos wastegates behind us.

The whole gang completely overran this Applebee’s. Thankfully the staff was quite welcoming and we tipped right.

The only two that know exactly how to prep for a photo:


There are a lot of great things to extract from this one:

The next morning the boys got up early, got gas, went to the auto parts store, and got all set up in the paddock:

Nikos doing Nikos activities
The early morning drive from the track was so memorable. The four migos cruising these smooth West Virginia roads, David’s wastegate screaming behind me, and some amazing weather truly sealed the deal. I really can’t ask for a more fitting way of starting a drift event.


After car show judging, we needed to come up with a strategy for the comp. We were all under the impression that we would be running Bridge Course like last year, but there was a last minute change to run pistol grip reverse, which was more challenging, and honestly, a good bit more fun.
We ultimately decided to have me start up front, and Seb in the rear. I had to run a shallow line going up the hill, then re-initating because I was unable to keep the rear tires spinning after hitting the crest. I later found out that the car actually lifted the rear wheels up the crest, which was nuts.


We then switched to have Seb leading, and he was right at home. I’m not sure where this side of him came from, but he really set the perfect pace for everyone to stack up.


We ended up taking home fourth place, and secured a spot at FB6 in Shawano. I was in complete disbelief, and at the time of writing this, still cannot believe that I’m going to be drifting this car at USAIR in a few months. All the pain I went through preparing for this really made it all worth it. This wasn’t really discussed much as well, but David Bob not only repaired and repainted his aero, but also helped Seb get his car ready while Seb was in L.A. He also fixed Nikos’ aero before paint. If you also break down the variables that went into this event, the odds were nowhere near our favor. Nikos was in a fresh car with limited seat time. David Bob had just finished boosting his ZN6, and Seb hadn’t drifted, let alone driven his car in months. All three of them street drove 5+ hours one way with relatively new setups. In some ways, this speaks to the ruggedness of Toyotas, but also how these things were put together. If that all wasn’t enough, this is my second event driving with these guys. I have the most laps by far with Diego, who wasn’t able to make it. We were able to overcome all these challenges as a group and ultimately persevere – but this is only the beginning.

Big thanks to Tyler Filipponi, Eric Ryon, and Rooster Photography for these awesome photos. We spent a good bit of time chatting in the pics, and it was a pleasure to meet a bunch of new people/drivers and to reconnect with old friends.


The boys posted up in the ride! Always a pleasure seeing these three. Even that goofy oaf sitting in the passenger seat giving me his usual strange stare

Once the competition was over, we did a few laps together and with others, then loaded the cars up and headed back to the hotel to decompress for a bit.


So that night we all took a shower and whatnot, then decided to go to the casino that was right by the hotel. I hopped in the shuttle and realized when we were a few blocks away from the hotel that I forgot my ID, which is kind of critical when you look like an infant and are going to a casino… To everyone’s amusement I got off the shuttle, ran back to the hotel, then realized I also forgot the key card to the room to grab my ID, classic. The concierge let me in, I grabbed the ID, then headed back to the casino!
I didn’t gamble or anything because I don’t know how, and because I basically gamble with my sanity whenever I try to drift this shitty car. It all evens out. The next day we did a bunch of open driving and just hung out. I think as you get older you begin to appreciate being in the company of lots of fantastic individuals instead of just drifting, especially as your circle grows smaller.


I have officially drifted with all of Tferg’s vehicles!!

Posted up with Mr. Carper, like we had talked about doing for so long. Love this guy, he’s always so supportive and dedicated as always to the shakotan.


Diane also took a bunch of awesome film shots:

This all effectively brings us back to present day. I have hardly touched the car, but have a really long list of things to do before FB6, some exterior, but mostly mechanical improvements in preparation for USAIR. All I have done to the car since SSE is a whole lot of cruising, street driving, and road trips!
I drove over to Bowie to visit my amigo Danny that I hadn’t seen in months.

Also went down to Richmond to chill with Nick and Tyler to celebrate Mogucki’s birthday.

I’ve spent dozens of hours on Assetto Corsa practicing for USAIR, and I believe switching to a 4.08 is going to be the right choice for the comp. I’m bringing both a 4.08 and a 4.90 to swap as needed, but I am a bit nervous about that track since while it looks like a complete blast, there are definitely a good bit of danger points. I’m also concerned about the height and how the car will fare on a track that compresses the suspension very aggressively with a lot of elevation changes. I’m going to start my prep in about a week, and hopefully everything goes well and nothing like it did earlier this year. I appreciate those of you that have read this far, stay tuned for the next one.
-migo