

Below is the first installment of the story of my 240sx coupe. This car came long before the hatch, approximately three years before, in August 2012. I wanted a “cool” car while I was in high school and driving around in a crusty Mercedes 190D just was not cutting it. Yes, they’re stout machines and look great, but the 65 horsepower and noisy diesel was a total bore. I tried “drifting” that 190D and hit a bunch of curbs, guardrails, you name it. I had a few bucks saved up from working after high school, and I looked at whole heap of rear wheel drive cars: MGBs, Miatas, 240sx, etc. I eventually settled on the 240sx and joined a local forum, MA240sx.net, to learn about the chassis. The Mid-Atlantic 240sx community was amazing, engaging, and eager to help people learn, absolutely nothing like the majority of the way things are now. I scrapped up the $1,200 I had and headed down to southern Maryland with my pops and a shitty tow dolly to pick up this heap:

This was the first car I ever bought, and I was tremendously excited about purchasing my first shitty 240sx to realize how sketchy the entire transaction was. I had purchased the 190D, but I bought it off a family friend so that hardly counts. I purchased the coupe from a gas station attendant who was obviously right-handed but signed the title and bill of sale with some chickenscratch out of her left hand. Once I was in the car headed home, I looked at the paperwork and realized the prior owner sold the car to the gas station because they charged the poor chap an exorbitant amount of money for a simple brake job. I noticed one of the wheel’s alignment looked a bit wonky and figured an alignment would fix it and oh boy, was I wrong. The coupe had a bent subframe stud, bent subframe, bent knuckle, the timing chain rattled, the 240sx starter pack. This was the first time I really started working on a car and the learning curve was steep. Eventually I got the car running OK and wanted to learn how to drift:

I went to a few track days and somewhat got the hang of the basics. I was still absolute trash and I bumped a wall once at Drift Nirvana.

At that point I realized that coupes are super cool and I didn’t want to trash the coupe. I wanted a dedicated car to drift, and that’s when I picked up the hatch. That was around 2015 or so. Once I swapped all my coilovers, subframe, etc. onto the hatch, the car basically just sat outside. I became so focused with the hatch and drifting that this car was completely neglected for about five years. So much for not trashing it! I couldn’t get rid of it because this vehicle was still special to me given that it was my first real experience with cars. Fast forward to late 2019 and all of a sudden the motivation came back. In or around 2017 I had tried to re-do the engine bay in black POR-15.
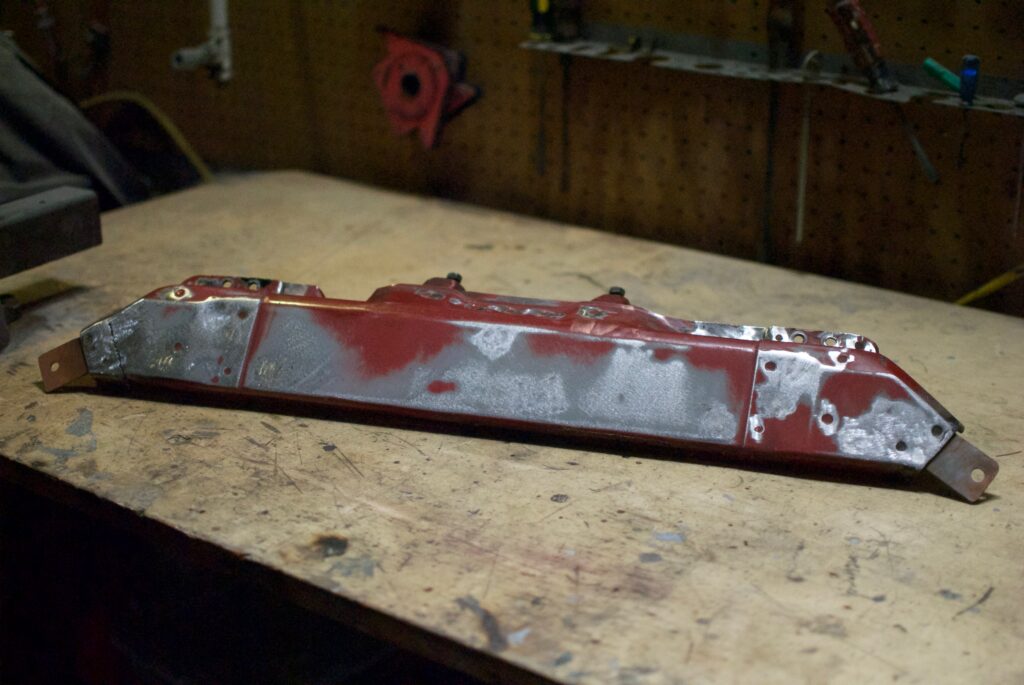
I had found the quarter panel on one side was more body filler with metal, so I had prepped the car for overs as well. Here’s what the pile looked like when I got started in the fall of 2019:


The POR-15 was peeling and flaking everywhere and just looking at this jalopy gave me headaches. I had a cool plan in my head so it was time to start stripping this monstrosity. I used a combination of a DA sander, a wire brush, and a portable sandblaster to make some decent progress. I had previously used etch primer like a total pinecone. The firewall was by far the worst part.


My girlfriend helped take the front suspension apart. Go team!

I had previously cut the core support all crooked. I test fit the piece back on and the placement and gaps were unpleasant. I was going to ignore this for now and fix it later.

Stripping everything in the engine bay down to bare metal took about 2-3 months. I was mainly working on the weekends and a few hours during the week when I had time. The process was unpleasant and I was not motivated enough to knock this out as fast as possible. It’s real easy to completely lose your momentum if you wear yourself out too quickly, and I was doing my best to enjoy the process despite the fact that this was a total bore of a task, not to mention debilitating on the body!
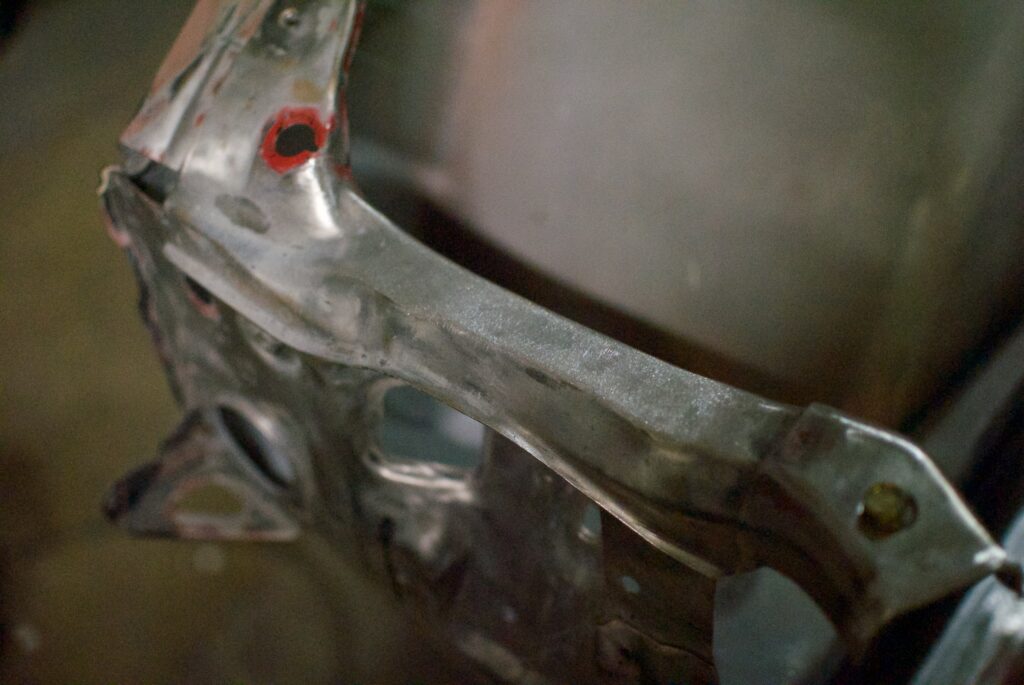
Once most of the bay was stripped, I noticed a few spots where the sheet metal was bubbling and corroding. These shitty cars always rust in between the overlapping panels after the seam sealer fails. The sealer chips off and allows moisture in between the thin pieces of steel, trapping the moisture and trashing the panels. This can occur in multiple locations but namely: the towers, the wheel wells, and the area under where the brake hardline passes through the body under the towers. Essentially anywhere that vertical panels overlap.

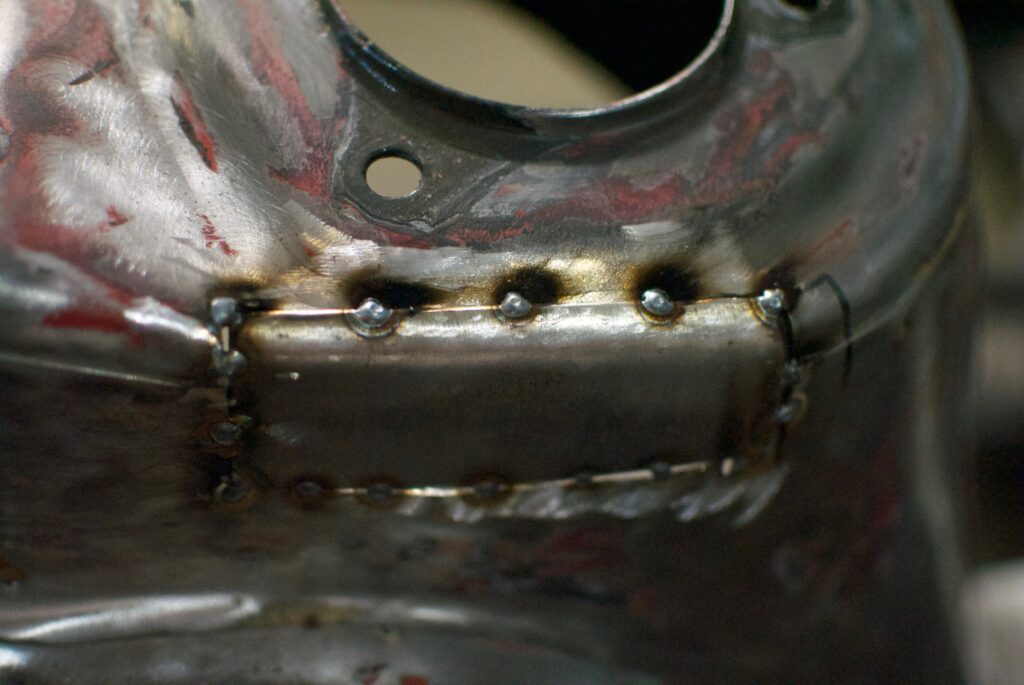
There was also some rust bubbling under the strut tower braces on the passenger side but I was too caught up in this repair to take before photos. Here’s the panel after I removed the spot welds on the brace, cut the rust out, welded fresh steel, then applied weld-thru primer:

Next, was the fun part. I’ve seen people put the old braces back on, but those are very thin and mine were crusty. I made two new braces to exactly replicate the OEM pieces out of 16GA steel as opposed to the shit 22GA braces that were on there. I had no desire to spot weld them on, either:

These bends were tough to get right!

Weld-thru primer on the underside to avoid corrosion:

Needed to be extra careful to not introduce excessive heat here and burn the weld thru primer, thus reducing corrosion protection:

Next, I trimmed a few ugly bits of the core support. I was going to install a PBM high mount, but this idea was scrapped.


At this point I started questioning everything about what I was doing. What was the goal? What was the vision? I originally wanted a cool street car with a simple, stock looking engine bay with a mild shave – much like the hatch. Somewhere along the way I went full dumbass and things just got out of control. Maybe I was looking at too many Volkswagens, who knows. Anyway, the new idea was to create the simplest engine setup I could with the least amount of pieces protruding from it. No turbos, intake pipes, wires, etc. The new vision was negative space, and maximizing it as much as possible. The engine needs to appear like it is taking a nap in a cradle.
With that being said, we needed to create the illusion of negative space and remove all holes in the engine bay.
Bluetooth wiring harness:

Bluetooth brakes:

I thought about cutting out this whole lower panel and welding a flat piece, but something about these shitty divots and dimples is kind of intriguing, so I just welded the hole and left them in place:

Remember I said something about getting carried away……?

As the project drew on, the vision began to evolve. I wanted to use the stock wheel tubs and work the metal out for clearance and ultimately smooth the steel out by hand. Well, the metal was really tired and I overworked it, warped it, and it became way too thin. The thought of the steel giving out at some point while driving petrified me, so I got rid of the stock wheel wells. In retrospect, I was happy that I did because I got to experience a new challenge – fully integrated wheel tubs into the stock paneling. I’m personally not a fan of tubbed engine bays, they look huge, cumbersome, and are seldom done in a way that looks aesthetically pleasing. I accepted this personal challenge to see if I can make these look decent! The new goal was to go absolutely wild with the shaving but retain as much of the stock panels, dimples, and ridges in the engine bay, albeit with no unused holes present.


I’ve seen tubs that extend from the side panel all the way to the frame rails – way too big. I’ve seen others that are cut short and look awkward. Some are way too tall and come up short in the front panel. I needed a middle ground so I ordered some massive 11″ tubs so I wasn’t limited by size. These bamas are 14GA and plenty thick to add some much needed reinforcement to this thin metal clunker.

I cut them in half and made some templates out of cardboard. To integrate the tub into the stock paneling in the engine bay, I had to be very precise about how I cut and trimmed the tub. I clocked in a good four hours per tub to make sure they were perfectly even!

Tacking the tubs into their final resting place was sensational! All the measuring, trimming, and test fitting was driving me insane. I was able to completely use the OEM side panel under the fender rails without using any new metal – goal accomplished!


Next was trimming and creating the side panel. I used a Blue Moon carton for a template.

Tacked the panels in:


I worked the metal very carefully along where the tub met the side panel so I could retain the clean rounded edge and avoid using any body filler. The process was meticulous, constantly measuring the clearance and panel gap so the weld could perfectly fill and seal the voids along the seam without introducing excess heat.

Next, I welded all the seams on the tubs. The towers and lower sections were welded from inside of the engine bay, and the side panel was welded from the wheel well side. I wanted to later blend that in really neatly with seam sealer, but I wanted the structure of a full, complete welded seam. This way, the tubs are firmly welded to the car but there is no weld to smooth out on the inside where it’s impossible to reach with a sander.
Cleaning out the tubs with a wire wheel was dreadful, I was covered in paint and crusty 30 year old undercoat. The amount of real estate we opened up in the wheel well was killer!

At this point the engine bay was ready for epoxy from the tubs back. Time to tackle the core support!
I was working like a horse with blinders shaving everything in sight and I shaved these holes then realized I didn’t have anywhere to mount the headlights! The original plan was a onevia PS13, but that was no longer the case and I forced myself into a silvia front.

Super excited with how these turned out, straight shave without body filler!
Next, I needed to fix that crooked cut on the core support with some welded material:

Then I needed to fully shave this piece and weld two tabs to make it fully removable. It’s one of the first things you’ll notice when you pop the hood!

With the core support all set and the final decision that the car would be naturally aspirated, I needed a cool solution for a radiator. Without an intercooler, I now had space to tuck a radiator and create an immense amount of negative space in the engine bay! Chasebays makes an awesome unit and they had just recently released a new version of their tucked radiator, so timing was spot on. After initial test fitting, this yam would need a heavy amount of work to fit under the core support. You can simply hack up the lower support and get the rad to slip between the rails, but there are two issues with that. First, you create an ugly gap on the corner of the core support and the rails. Second, it looks like something a complete degenerate from up country would do. We needed this thing to look tight so the goal was to make this radiator look like it came with the car from the factory.
Carefully cut out the corner with a dremel:

Tacked in a flush piece of 16GA steel

Welded all the way through, very carefully

And finally blended to look OEM:
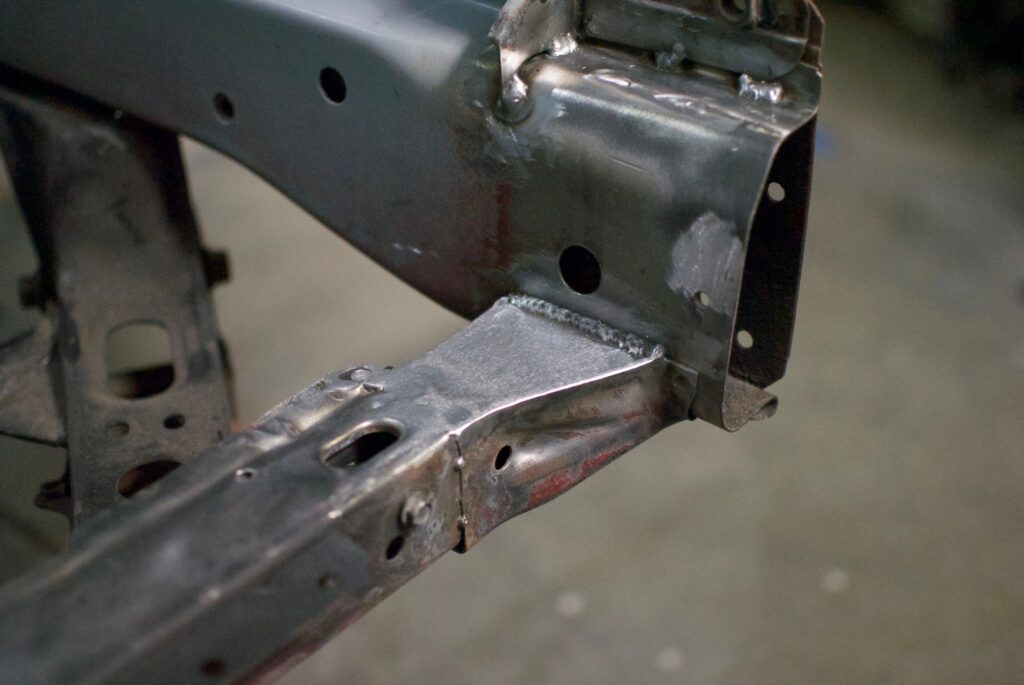
Now we ideally have the clearance for the tucked radiator, and the lower support is way stronger. This thing tends to rip off with hard driving, as has happened twice on my hatch.

Here’s a test fit – the rad will rest on the lower support and be bolted to the front core support via a long brass spacer, a long bolt, and the tabs provided:

Once this was done, I sprayed cavity wax inside the lower core support and inside the frame rails to prevent any internal corrosion. At this point just about all the metal work was completed and it was time to spray some epoxy to seal and protect all the bare metal from corrosion. I had never sprayed epoxy primer before, so this whole thing was a total learning experience. I went with Southern Polyurethanes (“SPI”) as my 2K epoxy, and in retrospect, I am very happy with my decision. SPI is amazing, they provide a paper manual and the customer service is great. You also have to order by phone, old school!
Check those seams on the edge of the panel. They came out relatively flat with minimal buildup so I could use a good seam sealer to integrate the panel into the tub so it would look factory.


The wheel wells were tricky to spray. I got a little epoxy on my eyebrows!

Now that everything is in epoxy, I could finalize the bodywork and begin applying seam sealer. Under the tubs and in the wheel wells I used 3M hardened body seam sealer:

This next bit was super exciting! The entire time I knew I wanted no seams visible at ALL in the engine bay. Everything needed to look blended and uniform. As a total novice in bodywork, I realized I had a few options, I could weld all the seams, grind them down, and apply filler. This would create a nicely blended result, albeit highly labor intensive. More problematically so, this would create a LOT of heat under the panel and potentially trash any factory corrosion protection that was already in place. One may argue that isn’t a huge deal since it’s probably toasted to begin with, but I didn’t feel comfortable introducing excess heat in between overlapping panels that are already susceptible enough to corrosion and failure. So I did some digging and found a self-leveling, flexible, and sandable seam sealer that was PERFECT for my needs. I had to get a special applicator gun but it was all worth it:


Here it is after sanding! It wasn’t the easiest stuff to feather and you really had to wait for it to cure, but the results were incredible!

I then sealed everything again with another coat of epoxy – I sanded through in a few spots as you can see. This was the exact vision I was going for – everything was sealed without heat and it looked blended! I also ended up with a small gap between the strut tower brace and the tower, but I ended up fixing that later with a bit more sealer. It drove me insane!
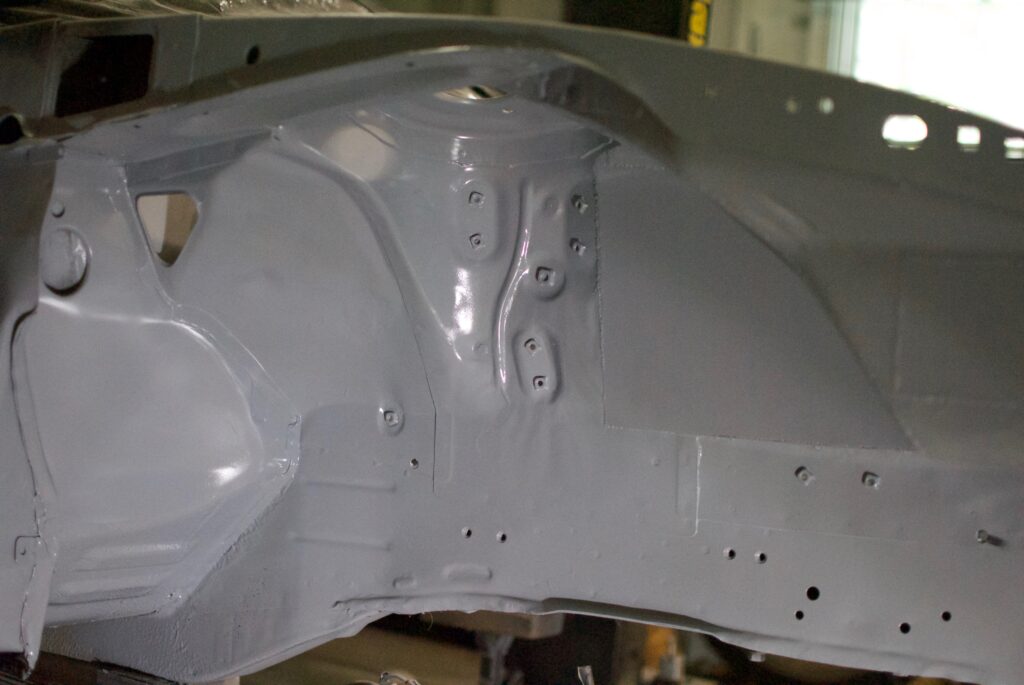
The whole engine bay was now sealed in epoxy, and I took a few days to breathe and relax. Now that the metal was protected I was not in such a rush to make moves on the car. I spent a few days researching how to spray the 2K primer and got another HVLP gun with a fatter tip to spray the thicker SPI 2K regular build primer. This stuff was THICC! I was a pinecone and did not reduce the primer so it sprayed on heavy, but I was content with the results. More importantly – the bay was now one even color and I got a glimpse of how everything would look!


Leveling out the bevel for the engine harness hole here was a complete pain in the ass! This was a TON of block sanding – glad it paid off!

Final test fit to make sure everything was good:


At this point, all that was left was final block sanding and wet sanding prior to sealer/color. I thought that after 2K epoxy and then 2K primer we would be in the home stretch – boy was I wrong. The block sanding at the end was painful and took a few weeks getting all the edges, corners, nooks, and crannies. My fingers and hands hurt daily and I spent hours touching up spots making sure they were all even. I was in pursuit of perfection (something that is never truly attainable) and started losing my mind! At some point I needed to call it and stop, and I was overall content with the progress.
I had thought about painting this car/engine bay myself but after the steep learning curve with the epoxy and 2k primers, I did not want to take a risk of having to fix another disaster. My boy, Deebo, who’s very much into the show quality Volkswagen game, connected me with his friend Danny who is a top tier painter and has painted tons of engine bays before – I knew this was the guy. Turns out, he’s also Colombian, a VW head, and a super cool dude! The original plan was to bolt up the suspension, take it apart, paint it, put it back together and roll it back on the trailer. I ruminated on the dangers of damaging my bodywork by doing that, especially the strut towers. Danny painted his last car on a dolly and suggested I do the same. I explored wheel dollies but that seemed silly and expensive. A few Modelos, some math, and a trip to Home Depot later and this is the result:

I bolted the chassis to the dolly with two x-braces in the front and rear, it ended up being plenty sturdy!
The following challenge was getting the jalopy on the trailer. Keep in mind it was early February and -5 to -10 degrees celsius. There was ice and snow all over the floor! Thankfully the winch did its job and I was able to push the heap across the ice.

I strapped the dolly to the trailer, then also strapped the chassis to the trailer to be safe. The trip was mad sketchy regardless and I was getting all sorts of looks on the road on the way to the paint booth.

I finally made the trip and rolled the car in. Danny and I spent the evening talking shit and getting the car masked up for spraying.

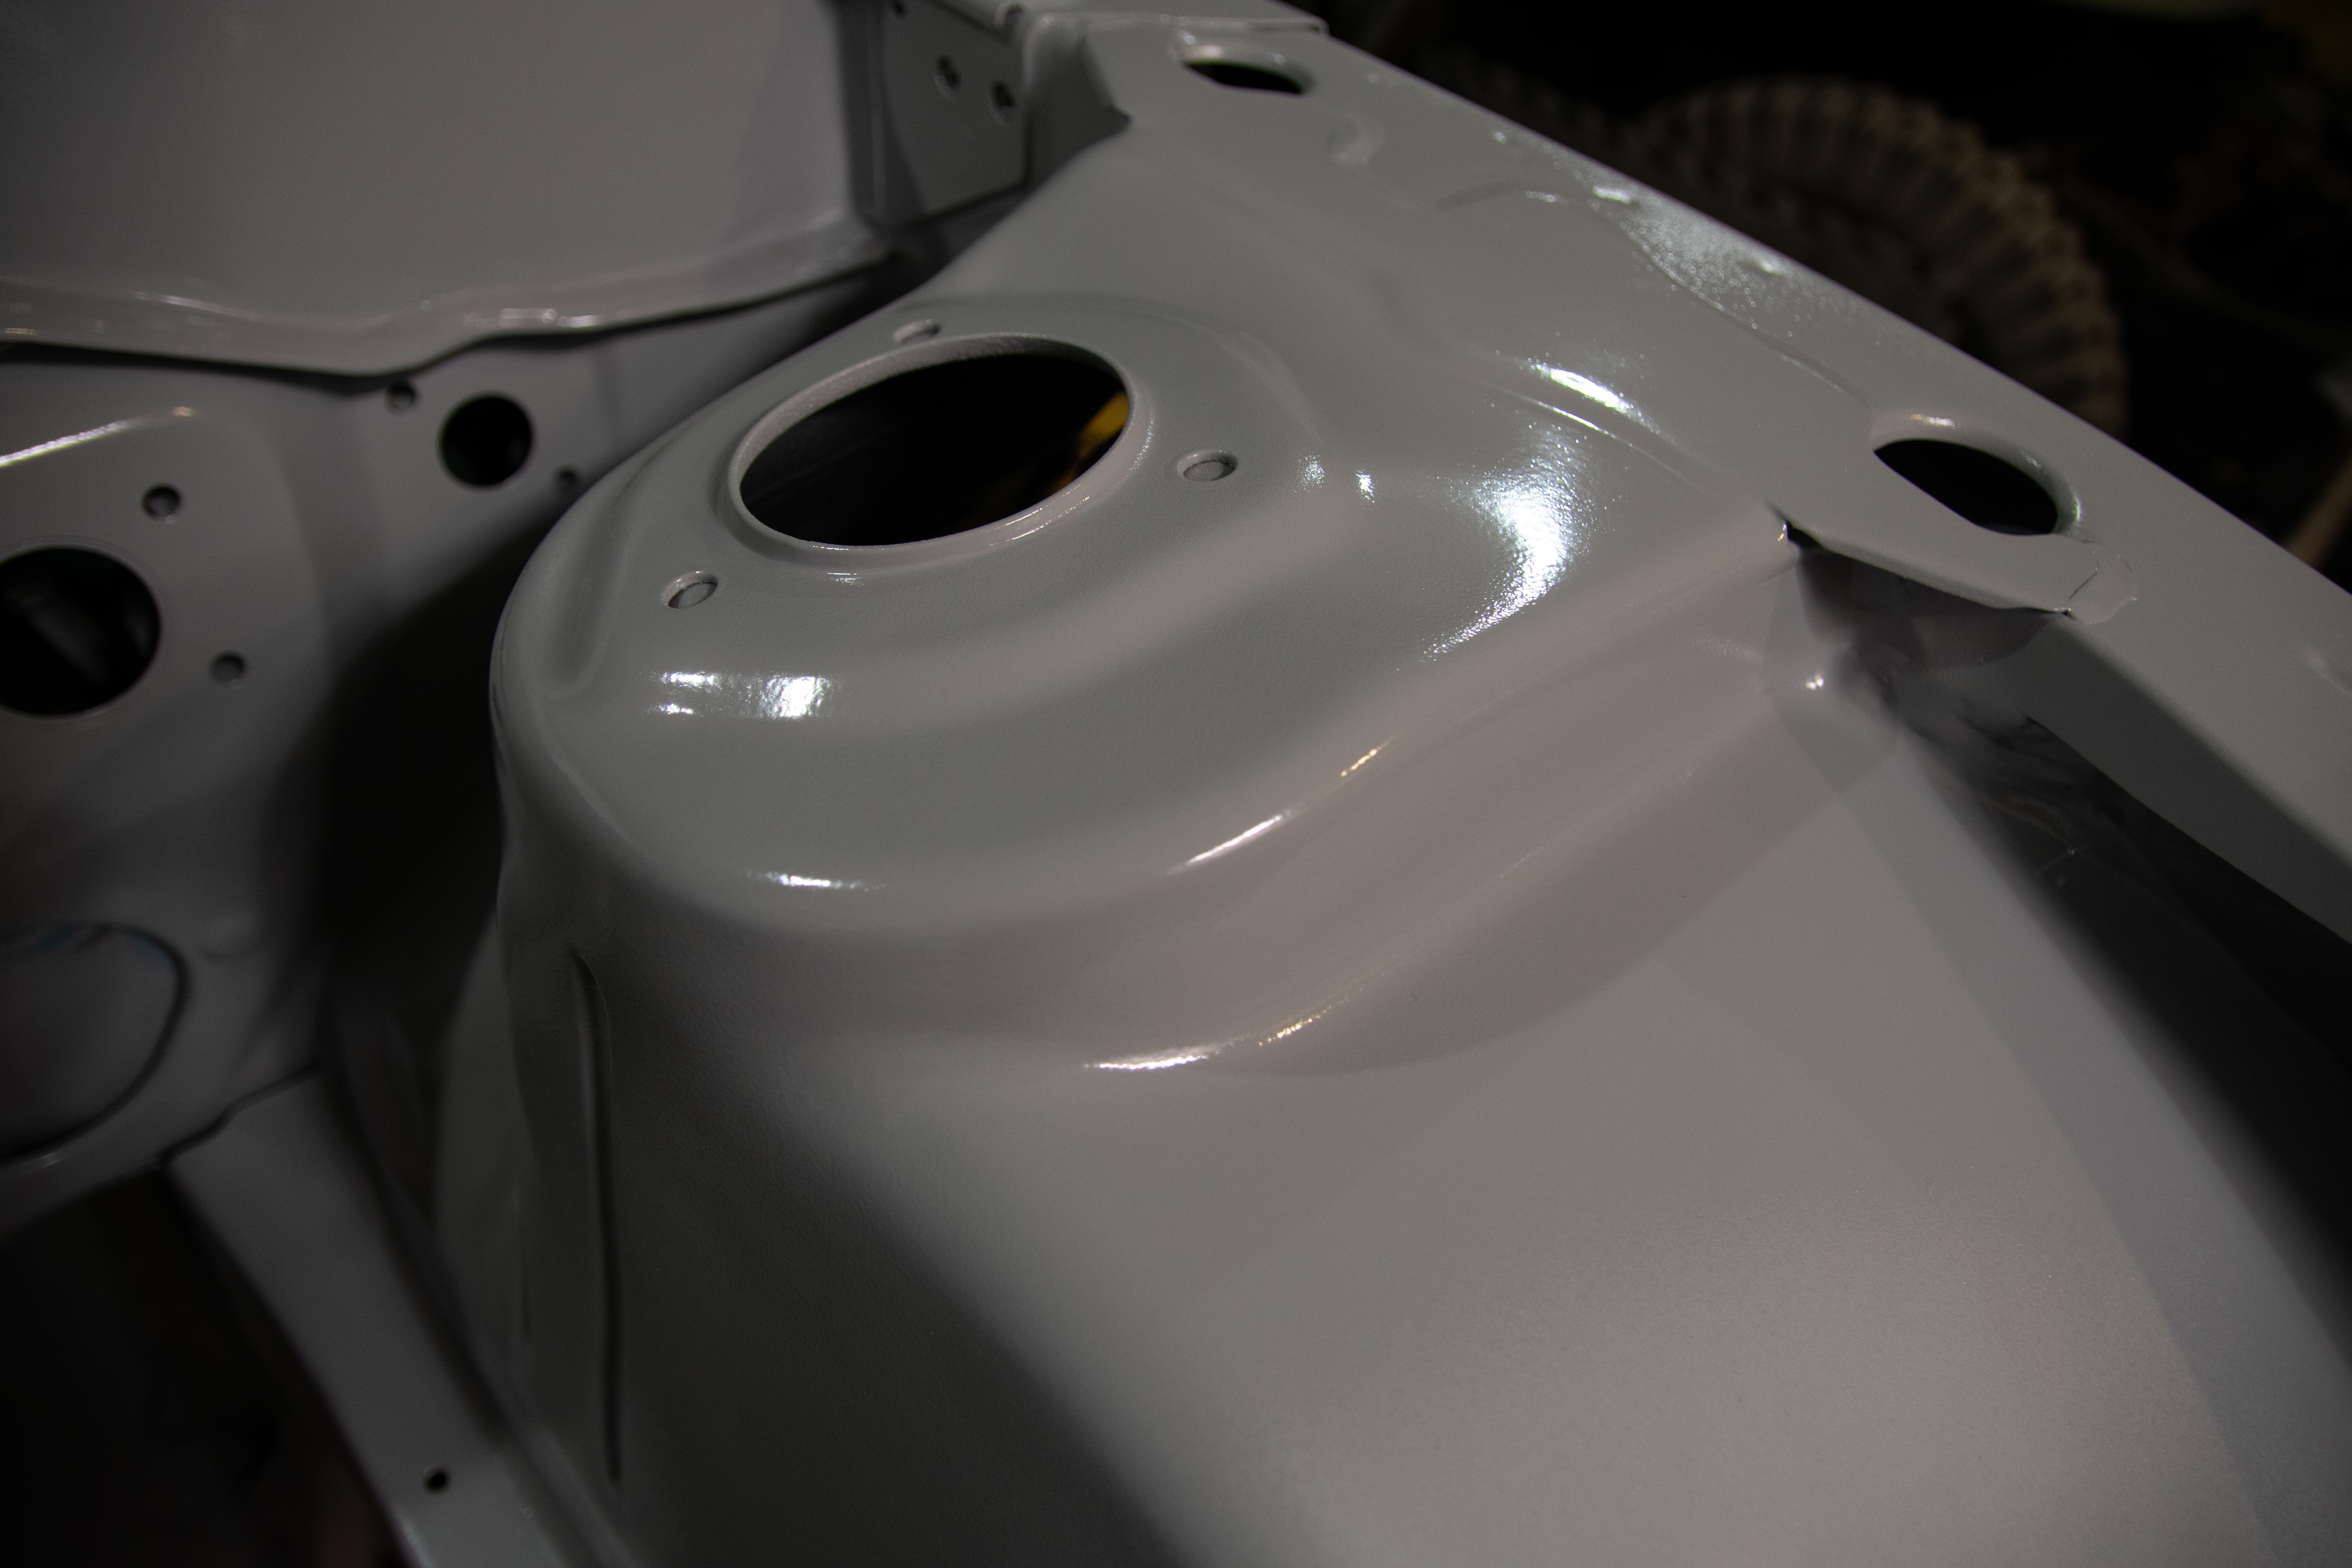
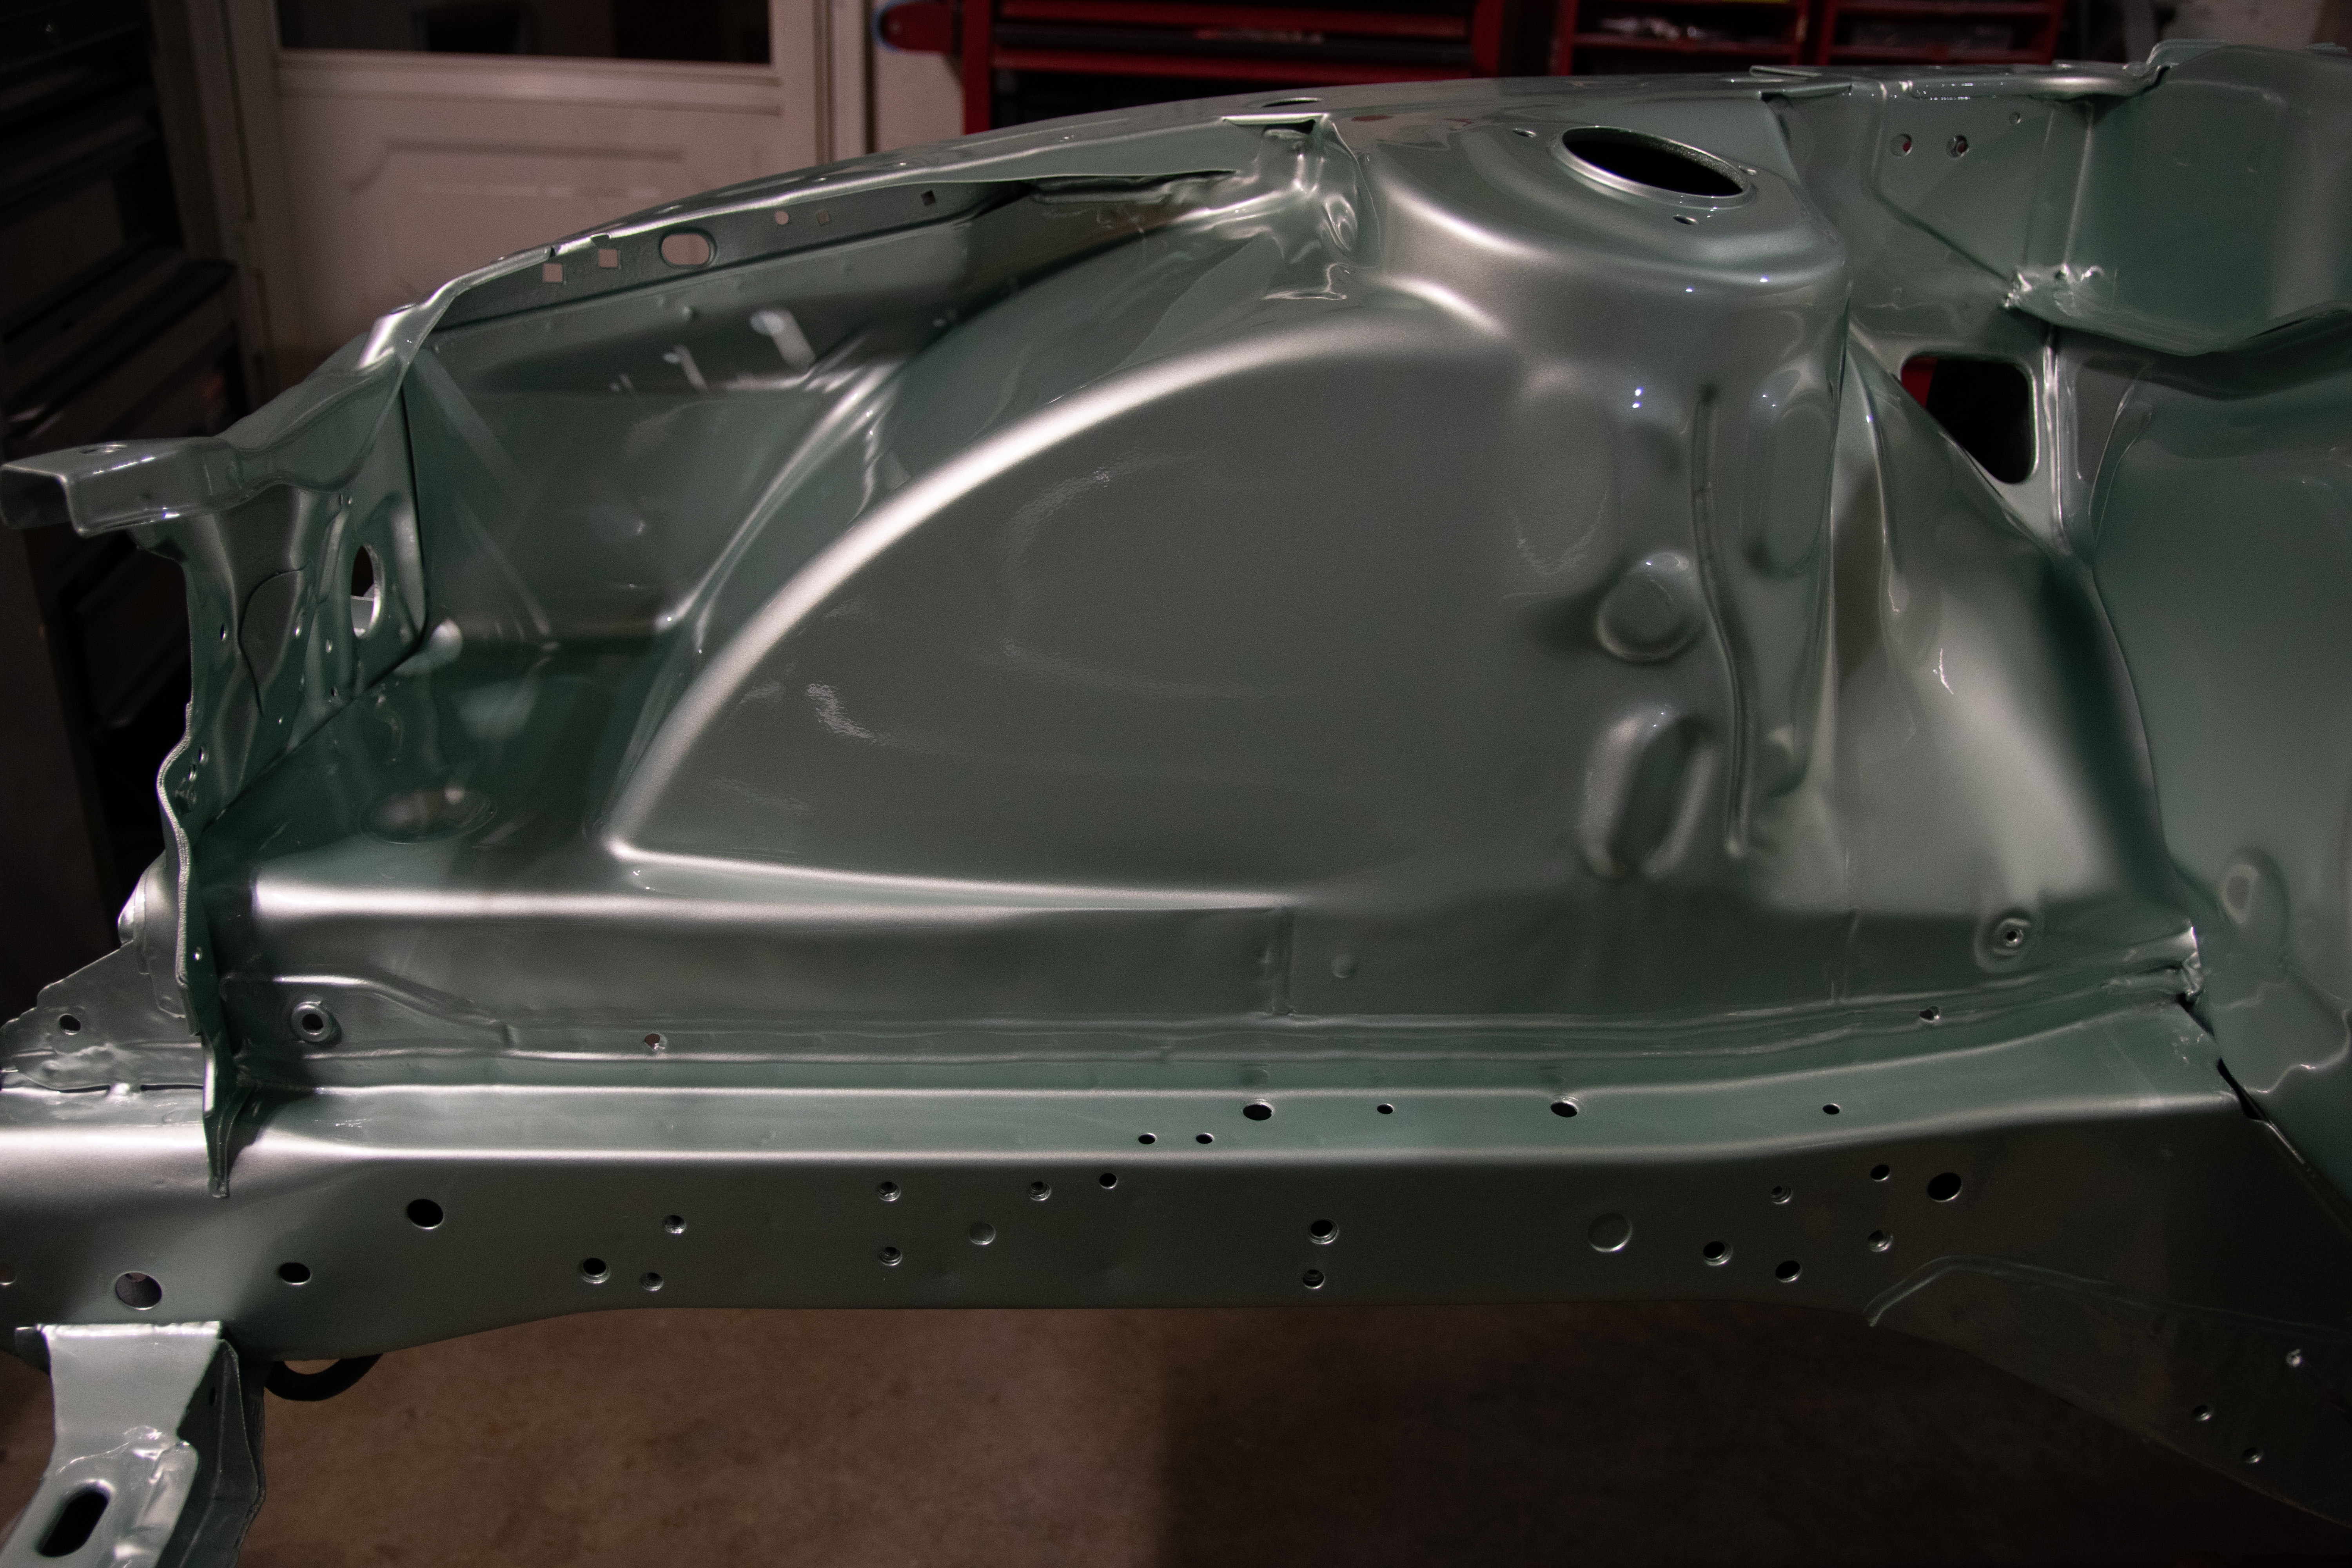
I went back to the booth the following night to help Danny move the car around and prepare for color. He then worked his magic and we let the car sit the next day to cure. We also got conveniently hit with another massive ice storm and when I pulled up with the trailer to pick the car up, the ENTIRE PARKING LOT WAS COVERED IN A HEFTY CHUNK OF ICE. Yeah, these are ideal conditions to pick up the shitbox you had just spent 17 months slaving away on! We laughed it off and got the car up without much of an issue, despite the ice rink we had to navigate.

I’ll freely admit that I shed a tear in the paint booth. This is a vision I’ve had for awhile now and it was absolutely incredible to see it come to fruition. Danny did an absolutely remarkable job with the paint and I’m pumped to see this car continue to evolve.


The next update on this car won’t be for awhile. I’ve been focusing on driving the hatch this year after taking over a year off to work on the coupe. Next, I’ll get moving on the coupe again and tackle the quarter panels!