
Black Friday sales induce a large amount of frustration among the car community. Even when you are in no position to be spending large amounts of capital, it’s oftentimes hard to pass up certain deals. You know what you’re purchasing will be necessitated in the future. This is how impulse purchases are justified, “I’m going to buy this in the future anyway, why not get it now for a fraction of the cost?” Well, I was in this exact scenario last November! I knew that a roll cage was in the works for the winter of 2017-2018, and I pulled the trigger on the Enjuku pre-bent 8 pt roll cage! In this post, I’ll describe the process of installing the cage, but also provide a comprehensive review of the product for anybody that wishes to embark on a similar journey. The amount of information online on the ER pre-bent cage is disparate, and hopefully this will shed some light on the product.
The cage arrives on a pallet, un-notched, and each tube is slightly longer than necessary to allow a custom fit. Before I got started, I removed everything from inside the car, and cleaned up the sound deadening where the cage would need to be welded. I also ordered 8′ of additional DOM tubing to practice on, and have handy in case I fubared a notch or cut (this was needed in retrospect).
The cage is certified for Formula Drift, thus compliant for US Drift and pro-am sanctioned events. I have no plans to participate in competitive drifting any time in the near future, but if I’m going to weld a roll cage to my vehicle, I want it to be compliant.
After stripping the interior, I began practicing some notching. I had never notched tubing before, and did copious research on the process beforehand. There seems to be a large dichotomy among the realm of race-car fabrication on the utility of a notcher. Some have had success with a cheap harbor-freight notcher, and others swear by expensive JD squared style notchers. Others entirely discredit the need for a formal notcher, and argue that all you need is a chop saw, a grinder, and some math. The latter seemed like a nice challenge, but more importantly, it was the frugal approach.
After hours of practice, the process of notching without fancy equipment became second nature, and allowed a nice custom fit.


I even tried some difficult angles to mimic the kinds of cuts necessary for the cage.

Welding on a perfectly notched tube is incredibly rewarding and not to mention highly satisfying!

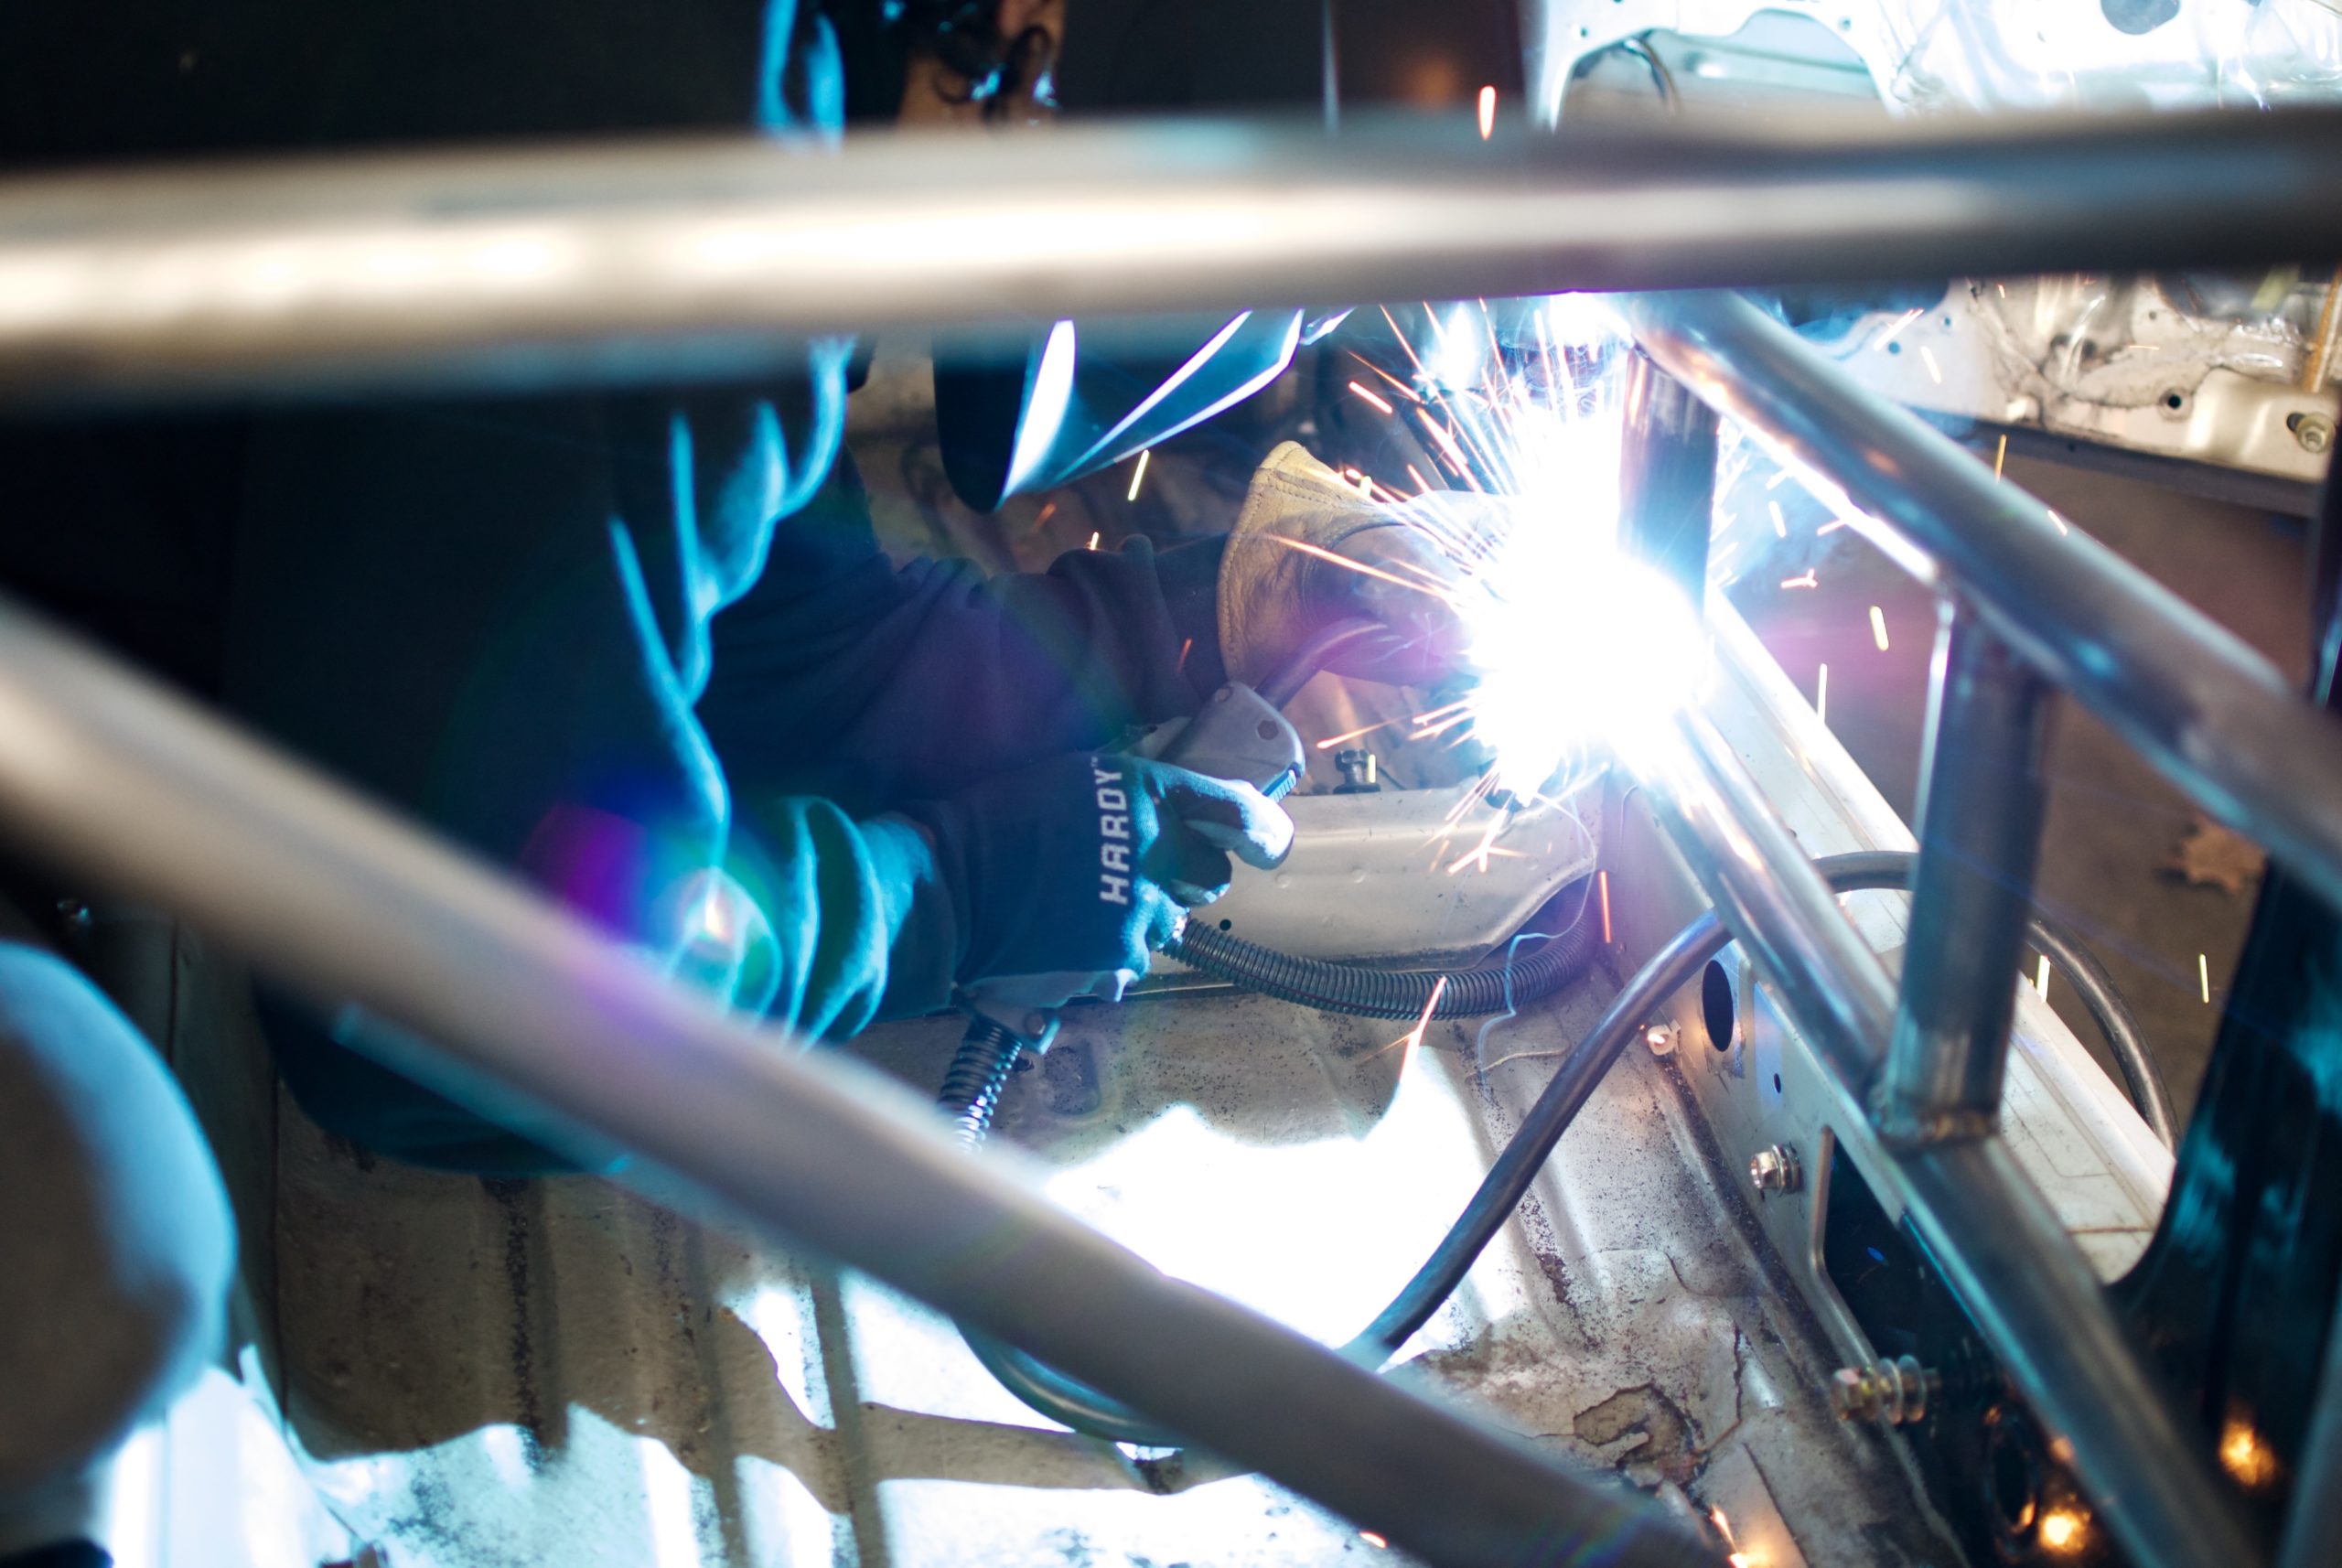
It was time to get started, I spent a solid few days making measurements and ensuring that everything was centered. The positioning of the main hoop was critical to the front down-bar distance from the A-pillar, but also driver’s seat clearance. I had some good help holding the tubing in place while I made my marks (thanks Lynds), and it was time to weld!
The first puzzle I needed to solve was the baseplate for the main hoop. The hoop legs sat on an awkward location on the floorboard, right by a 30 degree bend in the sheetmetal. I contoured a flat 1/8″ plate to the bends on the floor, then carefully cut an incision and reinforced it to create a flat platform for the hoop to sit on. The cuts were really tough, I had to exercise extreme care to prevent over-cutting the platform.


Here are the plates fully welded in! Side note: not ALL the welds on the cage came out aesthetically pleasing. Given the awkward location of some welds, I was focused on getting full penetration!

Front down bar plates

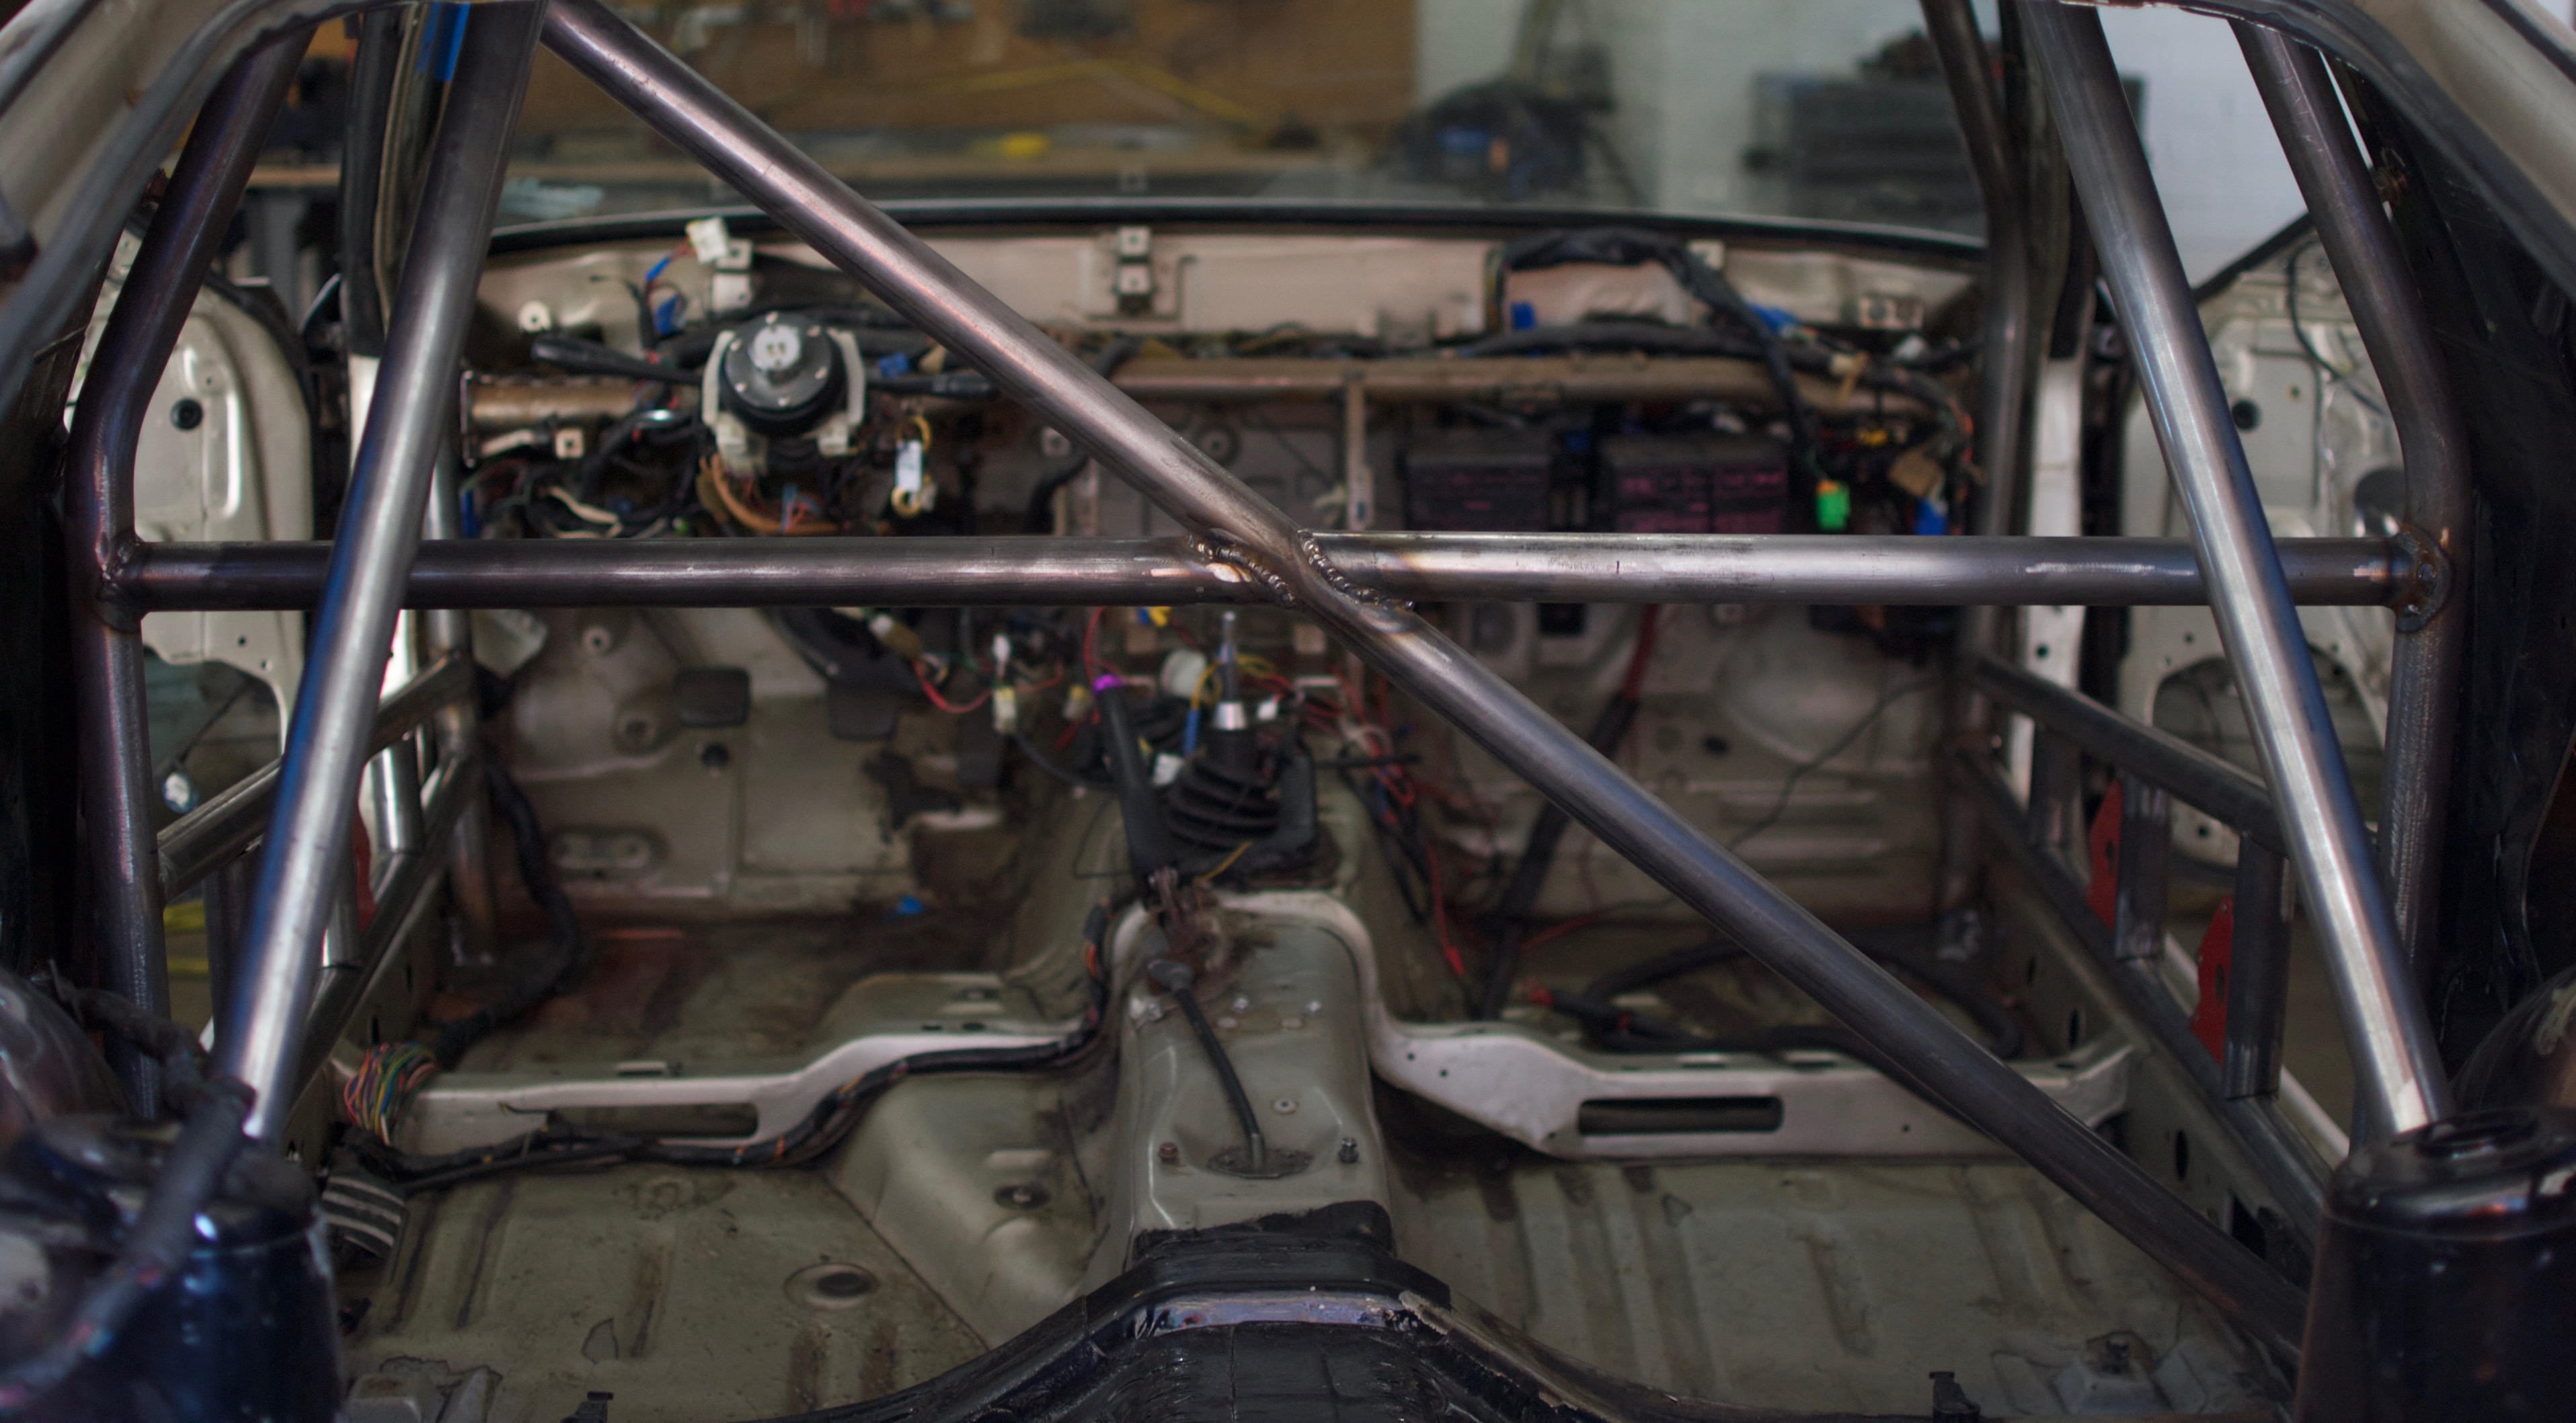
The diagonal and harness bar really tested the high-angle notching I practiced earlier. After lots of measurements, I was able to get the 0.5″ or 1/3 tube diameter overlap necessary for a safe weld.
This next part of the cage proved catastrophic. I wanted the down bars to connect the main hoop to the rear suspension pickup points for truly take advantage of the rigidity a roll cage offers. The pesky rear seat mounts were in the way, and those needed to be cut out and spot welded off the car. I utilized a mixture of both cutting and spot-weld removal to ditch those fastidious pieces of metal from the interior. At one point, I used a grinder to make more clearance for the drill. I was cutting in an awkward spot, and the blade broke, causing the grinder to catch and sever my knee. My girlfriend took me to the hospital, and I had 8 stitches put in, rendering me useless for two weeks (or so the doctor thought).
I wasn’t going to let this keep me from working on the cage, After a bit of healing I was anxious to get back in the car and keep working!

I didn’t weld in the additional strut bar brace, simply because I use the inside of the hatch to store and transport tires to the track and the brace would prevent that. Hopefully the cage provides sufficient bracing!
If there’s one thing I learned through the process, it’s that roll cage fabricators must be contortionists of some sort, or perhaps occupy themselves with hours of yoga. The angles, positions, and locations you need to weld are an absolute nightmare!

I wanted the door bars as wide as I could get them to allow seat clearance. I notched them at a slight angle to facilitate entry and exit.


The pre-bent nature of the cage does not allow for a true custom fit. You essentially have to adapt to what you have been dealt. I wasn’t a fan of the main halo design, I would have preferred two down bars from the main hoop to the floor. However, I imagine the cage was designed like this for ease of shipping. Either way, I was able to get the halo to hug the roofline and make contact all the way across.

This was one of the more difficult notches of the whole project! The two tubes were not on the same plane, thus measuring was tricky.

The design of the down bars did not allow for the bar to hug the A-pillar, this is the best I could do! Perhaps with a longer end portion, the bar could have hugged the A-pillar, but it would have required an extreme notch by the halo.

For safety reasons both on and off track, I made it a point to have the halo hug the roofline. I was able to get this portion of the cage to sit higher and tighter than my old Cusco/Safety 21 bolt-in. My head has sufficient clearance with and without my helmet!

With the door bars welded, I sanded the cage down and prepped the tubing along with the interior for paint. With no headliner, the interior looked silly in the OEM champagne color with half the car black so this needed to be addressed.


Putting all the interior back in, and looking at the completed and painted cage felt like inserting that last tiny piece of the jigsaw. Everything turned out exactly the way I pictured it in my mind just months prior. The entire endeavor took longer than I had expected, but as my first cage, I wanted to make sure no stone remained unturned. Now I can push my limits safely, and I increased the overall rigidity of the car! After completing the project, it was evident why fabricators charge what they do for such products. The math, measuring, and dedication necessary for a rollcage installation is bountiful.
Final Thoughts
During the sale, the cage ran about $400 shipped to my door. All you really need is a grinder, some flap disks, a chop saw, and a MIG welder, and the project can surely be completed effectively.
Pros-
- Inexpensive
- FD/US Drift legal
- Decent fitment
Cons-
- Comes un-notched
- May need to un-bend main hoop depending on application
- Utilizes halo instead of front down bars
- Tons of work!
Would I recommend this cage? Absolutely! If you have the patience, the tools, and tenacity to embark on this I would surely say go for it. It’s incredibly rewarding, there is a LOT to learn, and it’s a solid amount of welding practice. It gets frustrating at times, but with the end result engrained in your mind, it is easy to continue mashing on! Be sure to purchase extra tubing for practice and scraps!